How To Edit The Footer In WordPress [PLUS 9 Great Mods to Make]
When you buy something through one of the links on our site, we may earn an affiliate commission.
Many beginners to WordPress can quickly become frustrated trying to customize their website to how they envision it. One of these frustrations comes when learning how to edit the footer in WordPress.
To simplify things, I will cover all the possible modifications you can make to your WordPress footer and how exactly to make those changes.
Contents
- What Is a WordPress Footer?
- Reasons To Have and Edit a WordPress Footer
- Seven Steps On How To Edit The Footer in WordPress – Beginner's Guide
- 9 Modifications You Can Make When Learning How To Edit The WordPress Footer
- 1. Remove ‘Powered by WordPress' Text from Your Footer
- 2. Add Widgets To Your WordPress Footer
- 3. Change The WordPress Footer Background
- 4. Add A Menu To WordPress Footer
- 5. Remove the WordPress Footer Entirely
- 6. Remove Theme Identity From Your Footer
- 7. Add An HTML Code Or Script To The Footer
- 8. Add Social Media Icons To Your Footer
- 9. Optimize Your Footer For Local Search
- 5 WordPress Footers Help Inspire You
- Is it OK to Change or Remove the Footer Credits?
- Final Thoughts On How To Edit The Footer In WordPress
The WordPress footer is at the very bottom of your website that appears after the main content section.
With some exceptions, the footer appears on every page of a WordPress website most of the time. There may also be a sub footer on some websites.
- The Niche Pursuits WordPress footer.
Many new and first-time WordPress website builders overlook this website feature or go with a boilerplate layout. However, it's an excellent place to add immense value to your visitors and should not be ignored.
The footer is also a great place to enhance your website's search engine optimization capabilities with links to important pages. And include important disclaimers on each page of your affiliate site.
All top themes such as WP Astra, Kadence (and make sure to check out our comparison of Astra vs Kadence), Divi, or Ocean WP come with an adjustable footer. You can improve these theme footers by adding necessary links, widgets, custom code, or creating a completely different footer for specific pages of your website, such as landing pages.
Most themes out of the box provide a standardized footer with a single menu and copyright and year information text. While you could use this standard footer, you'd be doing yourself an incredible disservice.
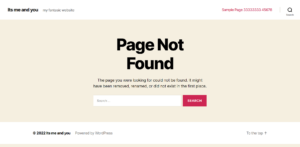
Instead, you'll likely want your footer bar to convey information that can't easily be added to other areas of your website.
Some of this information includes:
- Privacy Policy
- Terms and Conditions
- Business Address
- Links to Important Pages of Your Website
- Badges and Awards
- Payment Options
- Newsletter Sign Up Form
- Social Media Links
These edits make your footer more appealing to site users and make your website more functional. Some of these, such as site links, can enhance your SEO efforts.
This all contributes to your website being easier to use and provides a better user experience.
Learning how to edit the footer in WordPress doesn't have to be a challenge. To make it easier for you to get started, here are 7 different ways you can make edits to your website footer.
The WordPress Theme Customizer allows you to customize your website's appearance, change its header and footer (including logo), and alter other settings, including adding custom CSS.
This is the easiest way to edit the footers in WordPress and a more secure option for beginner users.
If you want to edit the footer using WordPress Theme Customizer, simply go to the Appearance section at the back end of your website (in your dashboard) and click “Customize.”
You can click on the footer button on the customization menu and play around with the various options, including adding menus, changing the colors, adding widgets, and more.
Just remember that usually, less is more when it comes to design.
WordPress is built on PHP, which stands for ‘PHP: Hypertext Preprocessor'.
But keep in mind:
You should never attempt to change the footer via PHP on an active website unless you understand clearly what you are doing.
If you are new to WordPress or PHP editing and want to learn how to edit your WordPress install via PHP, do so on a clean installation, not with an active business site.
To edit the footer theme file, go to your theme editor on the backend dashboard of your website and locate the file titled footer.php.
This is where you can make certain types of changes to your footer, including altering the branded text and site information.
Again, do not mess around with these files on an active website. If you must make changes, it's best to first edit on a staging site copy to avoid breaking your live site.
This is another method that you should not attempt on a live website. Editing the CSS on a live and in-use website can break the styling of the entire page or theme (so make sure to check out our guide on how to edit CSS in WordPress here).
So, you should only attempt this if you know what you're doing and on a staging site or a clean install if you want to learn.
To edit your WordPress footer using CSS, go to the theme customizer like you would using method 1 discussed above and head to the “Additional CSS” section. You will see a window that allows you to add in custom code with any changes you make displayed to the right.
If you are trying to make a specific change and aren't fluent in CSS, search Google for the particular change you want to make.
Someone likely has pre-made code you can use. However, only use code from reputable sources to avoid installing malicious code.
When you're finished making the changes, hit the publish button so that all changes are saved.
One of the primary reasons WordPress is attractive to beginner users is that almost any changes you want to make or features you want to add can be done through plugins.
You should avoid using plugins where possible though, as they can slow down your website and potentially break the styling with new unexpected updates.
However, if you're a beginner WordPress user, you can use plugins to easily edit and add features to your footer.
Some of the top plugins for editing the footer in WordPress include:
- Insert Headers and Footers
- Head Footer Code Manager
- Monarch Social Plugin
- Ultimate Footer Builder
- Footer Mega Grid Columns
- Remove Footer Credit
While there are tons more plugins, these listed come from reputable developers and should help you accomplish almost anything you need.
5. Add content with Elementor
Footers can be easily created with the pro version of Elementor Page Builder/template builder.
This allows you to create and apply custom headers and footers easily and can make styling everything simple for better consistency.
One aspect that makes this a great option is creating different custom footers for various pages of your website.
Typically, adding custom footers to different pages can be a complex process requiring editing the theme's code.
So, if you're a beginner looking to make more complex footers with ease, consider checking out Elementor Pro.
Elementor Pro isn't the only page builder that lets you easily customize your footer.
As noted above, a page builder can be a great way to create a stunning and functional footer without the need to know CSS or use multiple plugins. And there are a ton of options out there.
If you are already using a page builder for your website, you should look into whether or not it already has header and footer editing capabilities, such as Elementor.
Some of the more popular page builders that allow you to customize the header and footer include:
There are other page builders that allow you to customize your WordPress websites footer. However, these are some of the most commonly used builders and should be sufficient.
The entire purpose of editing your footer menu is to improve your user experience and optimize your website for search engines.
You can make various modifications to your footer to better fulfill each of these goals.
Before committing to any changes, consider how each change will improve your site. You don't want a crowded footer that slows down your site and confuses users.
Again please remember, when it comes to design and UX optimization, less is often more.
Most WordPress website themes include the message “Proudly powered by WordPress” at their footer.
There's no issue with having these messages, but you should make sure they reflect your brand and that everything, such as the date, is current.
You can edit or remove the message by editing the footer.php file or other methods discussed above. Before you make any changes though, make sure you've backed up your website and are editing on a staging copy of your site.
If you don't have a staging site to work on (maybe because you haven't seen our list of the best WordPress staging plugins), make all changes during your site's off-peak hours to avoid disruption to users and potential loss of monetization.
WordPress widgets are modular elements that allow you to add specific features to various parts of your website, such as the sidebar, header, or footer. The footer is broken up into four columns where you can add widgets as needed.
Some of the different types of widgets you can add to your footer include:
- Calendar
- Archive
- Categories List
- Custom Menu
- Meta Links
- Pages List
- Recent Comments
- Recent Posts
- Custom HTML
- Search
These are just some examples of the default widgets baked into WordPress. There are also numerous plugins that allow you to add custom widgets, such as WP Forms or similar plugins.
Another standard change that most people like to do is to change the background color on the footer of their WordPress website (click here to find out how to change background color in WordPress).
You have countless options here, including a simple color change, adding a background image, or making the footer background transparent.
With many themes, changing the background color can easily be accomplished through the customization menu one step one.
However, for more complex edits, such as adding in a photo image or pattern, you will likely need to edit the CSS or use a footer editor plugin.
Most WordPress website owners include different menus with links to your privacy policy, terms and conditions, cookies policy, and other legal documents.
You may also want to include important links to essential pages on your website, such as:
- Contact Us
- Blog (or similar resource)
- About Page
- Pricing
- Shop
- Services
Another menu you may want to create is one that contains links to important pages such as blog pages you want people to find.
Including these in the footer serves a twofold purpose.
- If you know, people are searching for them, putting these menu items in the footer makes them easy to find.
- It can also boost your SEO efforts by making it easy for search engines to discover them.
In some instances, you may want to remove the WordPress footer entirely. This is usually the case for landing pages or similar unique pages you want to be styled in a specific way.
You will need to decide first if you want to remove the footer entirely from your entire WordPress website or only on certain pages. Removing the footer entirely can be accomplished through both code and plugins.
If you only want to remove the plugin on certain pages, you will need a plugin or a page builder such as Elemetnor, which allows you to style certain pages without a header or footer.
You can remove the theme identity or theme developer's name in the same way you removed or altered the “Powered By WordPress” text from the footer. Usually, it's as easy as following a YouTube video and editing the CSS code.
Most theme developers will include some sort of branding with links back to their website or the theme sales page. This is especially true for free themes or the free version of freemium themes.
But before completely removing the theme identity or developer's branding, ensure it's not against the licensing agreement. Many free themes will require you to keep the branding unless you pay for the premium version.
Many webmasters usually put various scripts and tracking codes for applications like Google Analytics, AdSense, etc., in the site footer. You can easily accomplish this using a plugin or the standard WordPress custom HTML widget.
Be careful not to add too much code to your footer or header though, as this can slow down your website. Remember that every piece of code must be loaded when someone visits your site.
The more code that needs to be loaded, the longer it will take for your website to become usable and may lead people to bounce.
Another standard change that most people will want to make is adding links to your social media pages to your WordPress website's footer.
This can be accomplished either by adding text links or, more popular, by adding social media icons styled to match your website's branding.
There are various ways to do this, including plugins or widgets.
But again, I recommend avoiding extra plugins whenever possible, especially with social media icons. If you must, you can use a header footer builder such as the one with Elementor Pro as an alternative.
Without shaming any specific plugins, many of the social media icon plugins I've used in the past slowed down my website considerably.
And remember that speed is important for creating a positive user experience, so avoid extra plugins where possible.
For brick and mortar businesses that serve a specific geographic region, you can use the footer to optimize for local search. This includes adding a Google Map and your address and other local business information.
One other standard change is for service area businesses to include links to location-specific pages in the footer to help Google and other search engines better understand the company's service area.
Make to create and link to content-rich location pages, and don't just stuff the names of locations in the footer as this is low value and creates poor UX.
One thing that can be challenging when learning how to edit the footer in WordPress is finding inspiration.
So many websites choose to do something basic, which can contribute to poor UX. But here are some examples of different types of websites doing their footer right.
Blog Sites – Nomadic Matt
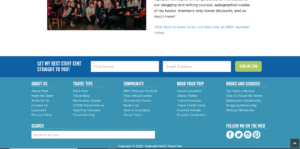
Nomadic Matt is one of the leading travel websites around. I've been a massive fan of the website since the late 2000s and visited it often during my backpacking days.
Over the years, the site has undergone extensive redesigns that have greatly improved the user experience and aesthetics. One of these improvements is the footer area.
The Nomadic Matt footer does a great job of outlining the essential areas of the website. This helps with SEO and ensures users don't have to search for long to find what they want.
You also have easy access to social media pages, which is essential for travel bloggers. Finally, the site has a prominent lead capture form allowing new users to sign up for the newsletter.
Agency Sites – eXcelebrate
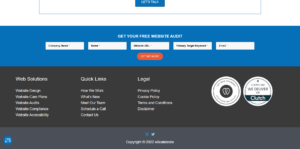
The eXcelebrate agency works with small and medium-sized businesses to provide web design, website care plans, and custom marketing solutions. Full disclosure, I'm a partner at the agency though I did not design the website.
What the footer does right, for one, is the use of badges from reputable marketing ratings and review sites to add trust factors for potential clients.
It also has a unique lead capture at the top of the footer allowing visitors to conduct a website audit. Finally, the site makes it easy to find essential pages due to three intuitive menus that are clearly labeled.
SaaS Sites – Hubspot
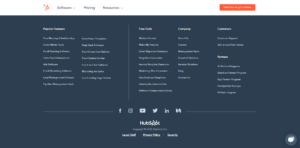
As one of the world's largest sales and marketing technology companies, you can count on HubSpot for solid design, including its website footer.
The SaaS website does a great job of intuitively laying out the footer to be helpful to the different types of visitors that will be using the website, including:
- Business owners
- Marketing agency owners
- Potential partners
- Investors
- Prospective employees
Aside from juggling the needs of these different visitors, the footer is still clean and intuitive without feeling cluttered or overburdened. Finally, all social pages are displayed, making it easy to follow them on different platforms.
Niche Sites – Carnivore Style
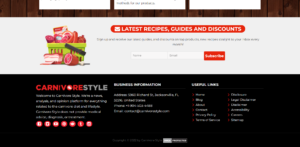
Carnivore Style is a niche website focused on the carnivore diet and general meat-eating topics. It was designed by one of the top affiliate marketing groups in the industry.
This is an example of a footer designed almost exclusively for search engine optimization while balancing user experience.
The footer optimally utilizes the space with a full-text description of the website, trust-building factors such as the business address and social media links, and links to specific trust-building pages.
Ecommerce Sites – Patagonia
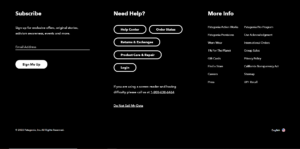
Patagonia is a major online retailer with millions of unique visitors each month. Like HubSpot, the outdoor clothing giant does an excellent job balancing the needs of all the different users who visit its website.
The website footer is intuitively laid out with quick links for users that may need customer service or who might be looking for things like the company's return policy.
While that may not seem like a big deal, you want it to be as easy as possible for someone who needs help or wants to return a product to accomplish their goal. This can potentially help reduce complaints they may have.
One other thing they've done an excellent job with is having clear information on linking to their data policy with the Do Not Sell My Information Link. That, along with the phone number for people having issues with screen readers, helps to provide an inclusive experience for all visitors.
If you've already picked a WordPress theme and performed an install, you will likely notice that there is a copyright or designed by text at the bottom. This is especially true if you use a free version of a premium theme.
The answer to whether you can remove this text is that it depends. As mentioned above, many theme builders have clauses in their documentation requiring free users to leave these text and links. However, you are usually good to remove it if you purchase the premium version.
Before making any changes to the website though, check the documentation to ensure you remain compliant with the licensing and user agreement.
Learning how to edit the footer in WordPress is an essential step to mastering WordPress design and getting the exact website you want. You should always make sure that your footers serve the greater purpose of your website and provide a quality user experience.
You must carefully plan changes to your footer and avoid adding too many widgets or other elements that may slow down your website and clutter your footer.
Also, make sure any changes you make to your footer are done either on a staging site or during off-peak hours to ensure minimal disruption to your site visitors in case you break something.
And for more ways to customize your site, check out our guide on how to edit the menu in WordPress.
Want to learn step-by-step how I built my Niche Site Empire up to a full-time income?
Yes! I Love to Learn
Learn How I Built My Niche Site Empire to a Full-time Income
- How to Pick the Right Keywords at the START, and avoid the losers
- How to Scale and Outsource 90% of the Work, Allowing Your Empire to GROW Without You
- How to Build a Site That Gets REAL TRAFFIC FROM GOOGLE (every. single. day.)
- Subscribe to the Niche Pursuits Newsletter delivered with value 3X per week
My top recommendations
