How To Change Favicon In WordPress (Multiple Options Step-By-Step)

When you buy something through one of the links on our site, we may earn an affiliate commission.
Want to know how to change favicon in WordPress?
Then you’re in luck because this article is going to show you four different ways to change your favicon, and they’re all doable in less than 5 minutes.
I’ll show you how to use the inbuilt WordPress customizer, a favicon plugin, cPanel, and how to do it manually with FTP (File Transfer Protocol).
Don’t worry; they’re all easy methods that anyone can do — follow the steps, and you can’t go wrong.
Let’s dive in.
Contents
What Is A Favicon?
You know those little icons you see in the browser next to the name of the webpage? That’s the favicon. You see them when you have multiple pages open, and they’re often a letter or a logo image to represent the website’s brand.
Take a look at the image below:
The images next to the web pages are favicons, and almost all established websites have them. You probably should too.
They are typically 16×16 or 32×32 pixels for website use. On WordPress, they instruct you to upload a square image file at least 512×512 pixels for best results. You can design your favicon yourself, pay someone to create one for you, or use a free favicon generator tool like Favicon.io.
Favicon.io will allow you to use their free favicon generators to create a favicon from PNG files, ICO files, and emoji. You simply select the image, text, or emoji and convert to ICO format.
Are Favicons Important?

Yes, because they help build your brand, improve the user experience (UX), and add a touch of professionalism to your businesses.
Favicons are visible in browser tabs, bookmarks, and other places such as cell-phone search tab pages, toolbars, website history pages, and more.
These icons help your users recognize your website quicker and offer a faster way to find your page when they have multiple tabs open.
How To Change The Favicon In WordPress? (4 Simple Options)
Now that you know what a favicon is and why they're important, let’s look at how to change your favicon in WordPress.
You have four options — we’ll start with the WordPress customizer.
WordPress Customizer To Change Favicon
WordPress has always been easy to use, and installing a favicon is as easy as it can be.
Step 1.
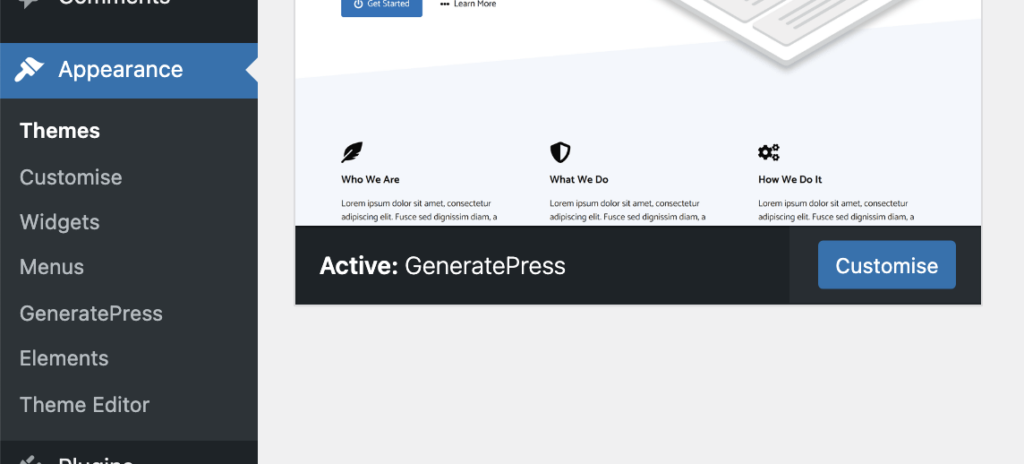
Log in to your WordPress dashboard and select the “Customize” option under the “Appearance” section.
Step 2.
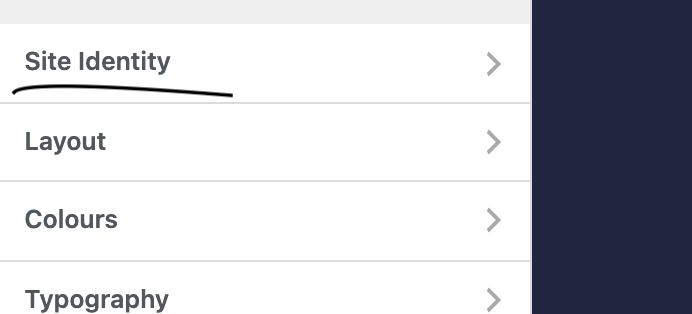
Select “Site Identity.”
Step 3.
Once you select Site Identity, you will see the site title, tagline, logo, and site icon options. The site icon is the setting you will use to change your favicon.
Select the “Remove or Change Image” option.
You will then upload or change your logo favicon. If you already have the favicon image file uploaded in the WordPress media area, simply choose the image you want to use, press select, and hit publish.
If the favicon image hasn’t yet been uploaded, you’ll need to select “Upload Files,” locate the site icon on your computer, crop it to size, add alt text, press select, and publish.
That’s all you need to do to change a favicon in WordPress (click here to learn how to change the logo in your WordPress header).
Use A Favicon Plugin To Change Your Favicon On WordPress
Another option to change the favicon in WordPress is to use a WordPress plugin. The stand-out plugin as of today is the ‘Favicon by Real Favicon Generator.’ This free plugin by Phillipe Bernard will help you to create and change a favicon with ease.
You can create favicons in minutes using the plugin. The favicons work on all desktop browsers, including Windows, iOS, and more. In addition, the plugin will enable you to create favicons for Android devices, Apple devices, and Windows tablets.
Here are the steps to use the plugin.
Step 1.
Go to Plugins in the WordPress dashboard, and select “Add New.”
Step 2.
Type the word “Favicon” into the search bar and select the plugin “Real Favicon Generator.” Next, press the “Install Now” button and click “Activate.”
Step 3.
Select the favicon option from within the Appearance menu.
Step 4.
You will see a page to select a master image from the WordPress media library. If you don’t have a picture you want to use in the library, you can leave it blank. The plugin will ask you to select the image from your computer once you click the “Generate Favicon” button.
Step 5.
Select the image you want to use, and the plugin will direct you to a webpage with the favicon files it has created. You will see example images for iOS, desktop, apps, and a few more.
Fill out the options, and select “Generate Your Favicons and HTML code.”
Step 6.
The plugin will create the favicon and display it in the WordPress dashboard with the different images for each use (Windows, iOS, Apps, etc.).
You can then check the favicon in the browser to see how it looks.
The video below explains how to use the plugin in more detail:
Add Favicon Manually Through FTP
Another option for learning how to change favicon in WordPress is by doing it manually using FTP. Once you have your favicon image, you will need to upload the files using FTP (File Protocol Transfer).
Step 1.
Head over to the favicon generator, and select the favicon icon image you will be using.
Step 2.
Scroll to the bottom of the page and select the option to add the favicon files to the root of your website. Also, click on the button saying “Generate Favicon and HTML Files.”
Step 3.
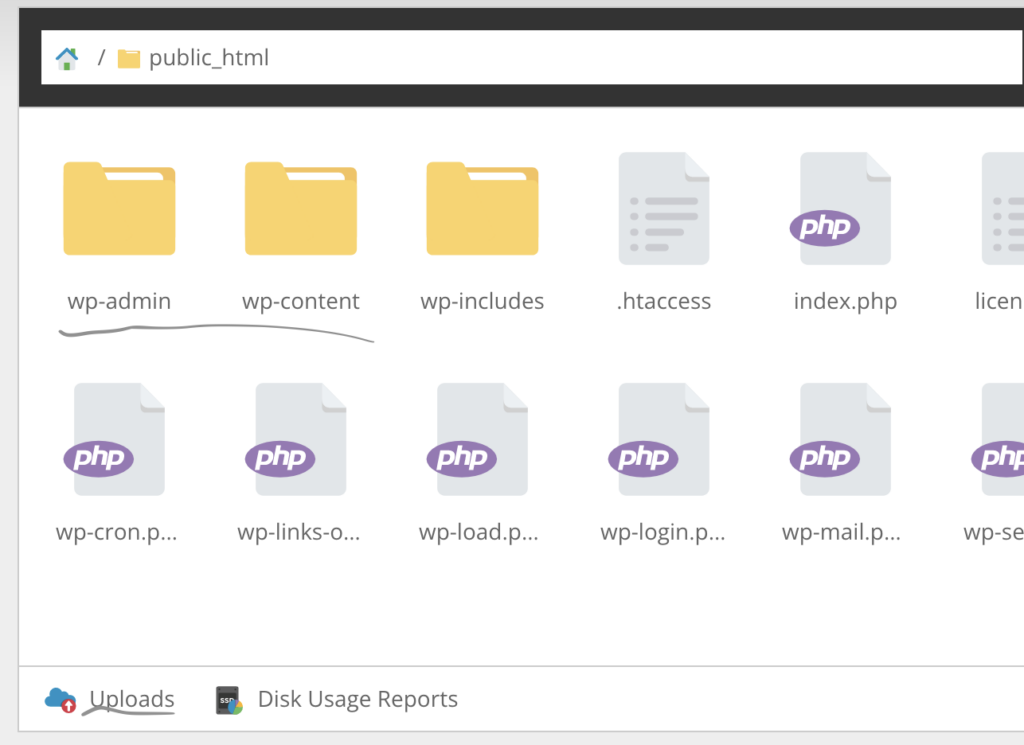
You then see instructions to install your favicon files manually. But first, you will download the package, extract the files, and upload them to the root of your website in the same folder as your WP-Content and WP-admin files.
You will be using FTP to upload the files, and you will need an FTP client like Filezilla to do the job. (The hosting details you need to access your website files will be in the welcome email from your host. If you don’t have the email, contact your host for your FTP login details.)
Once you have extracted the files and added them to the root of the website, you will need to paste the code provided into the head section of your website.
Step 4.
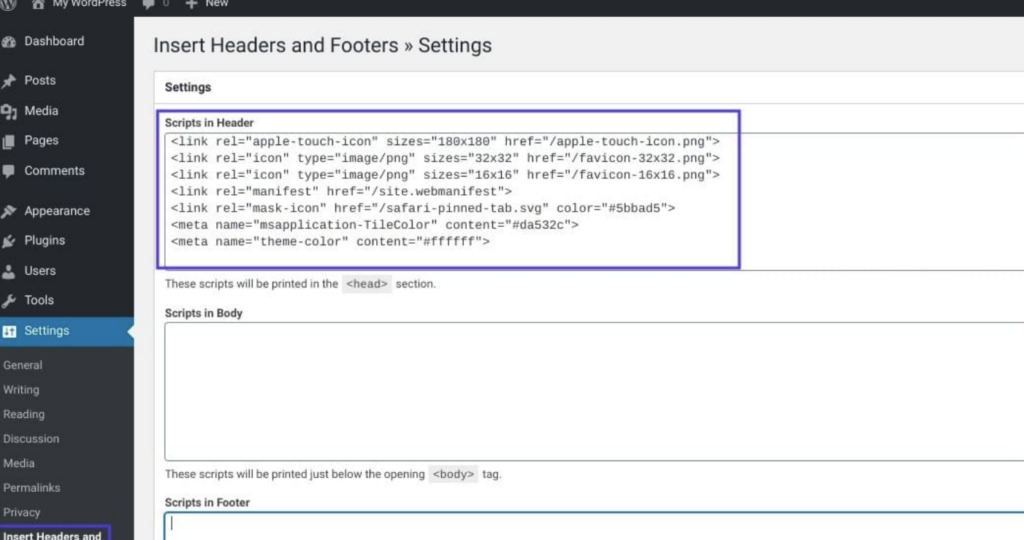
You can add the code manually using FTP and paste the code into the head section in the header.php file, or use a WordPress plugin like this one from WP Beginner.
With the plugin, you will add the code to the header area in the settings like below:
And that’s all you need to do to add a favicon manually. The video below will walk you through the process.
How To Change Favicon In WordPress Using cPanel
The last way to change the favicon in WordPress is through cPanel. It’s not much different than using FTP, just that you don’t need an FTP client. Instead of connecting to your website backend files using FTP, you do so through cPanel.
Step 1.
Create a favicon or use a pre-existing one with the Favicon Generator For Real software.
Step 2.
Click the button at the bottom of the page to generate the HTML Files.
Step 3.
Upload the favicon files to the same folder as WP-Admin and WP-Content files, but this time you will be using cPanel.
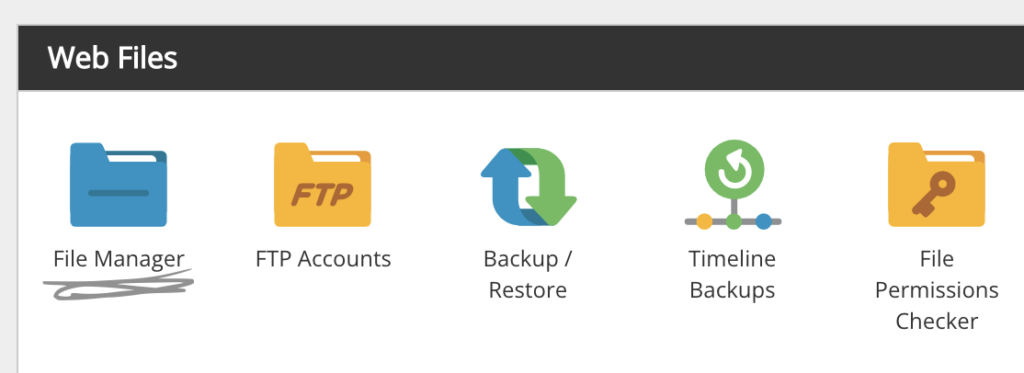
Log in to cPanel and select “File Manager.”
Step 4.
Select the public_html folder, and you will then see the root directory for your website which contains the WordPress files. This is the place to upload the extracted favicon files.
You click on the “Upload” button at the bottom of the page and select the files on your hard drive.

Step 5.
You can now add the code for the favicon to the website’s head section using the same upload steps as above or by using a WordPress plugin.
Extra Advice For Favicons
Below is a selection of questions related to favicons.
What happens if you don’t have a favicon?
If you don't have a favicon, the browser will display a generic symbol of their choosing.
Are there any SEO benefits for having a Favicon?
There are no direct SEO benefits. However, you could get indirect SEO benefits because you will improve the user experience and branding, which makes your website more popular.
Do Favicons Have To Be ICO Files?
No, while most favicons use ICO file format for the site icons, you can also use PNG, JPEG, GIF, and SVG. Take a read of this article which shows you the browsers and different platforms compatible with various formats.
How Do I Change Favicon In WordPress Elementor?
Use the methods mentioned in this article. The easiest way is to use the WordPress Customizer option.
Get Elementor HereWhat If I Don't Have A Customizer Option?
If you are using a blocks WordPress theme, you may notice that the customizer option is missing. Instead, you need to go to the “Appearance” menu, click on “Themes,” and select the “Customize” option for the theme you are using.
Final Words On How To Change Favicon In WordPress
A Favicon is a vital site icon to have on your website. You can create a site icon using free tools, or you could pay someone to design a more advanced one for your site.
Favicons will help website visitors recognize your brand quickly through the image you use when they have multiple tabs open.
You have four simple methods that show you how to change favicon in WordPress, and all of them will take you less than five minutes from start to finish.
They are:
- Upload your favicon using the WordPress customizer
- Use a free and popular WordPress Plugin to add or change your favicon
- Upload the site icon through cPanel
- Use FTP (File Transfer Protocol) to add your favicon manually
I have listed them in order of how easy they are to do.
Hopefully, they will help you out when uploading your favicon.
Want to learn step-by-step how I built my Niche Site Empire up to a full-time income?
Yes! I Love to Learn
Learn How I Built My Niche Site Empire to a Full-time Income
- How to Pick the Right Keywords at the START, and avoid the losers
- How to Scale and Outsource 90% of the Work, Allowing Your Empire to GROW Without You
- How to Build a Site That Gets REAL TRAFFIC FROM GOOGLE (every. single. day.)
- Subscribe to the Niche Pursuits Newsletter delivered with value 3X per week
My top recommendations


