Squarespace Testimonial Slider: 3 Easy Steps to Add Your Reviews

When you buy something through one of the links on our site, we may earn an affiliate commission.
You have a long list of testimonials from satisfied customers that you want to share with the world. If you are using a Squarespace website, it should be easy to use their drag-and-drop format to add this text. How do you create a Squarespace testimonial slider with ease?
In this detailed how-to guide, we will break down just how to add your testimonial text to any page of your Squarespace website with just a few simple steps!
Contents
How Do You Create a Testimonial Slider in Squarespace?
Adding a testimonial slider in Squarespace can be done with ease, whether you want to make your own or use a plugin. Follow these directions to get your reviews posted on whatever page suits you. You should be able to follow these steps regardless of which of the best Squarespace templates you are using.
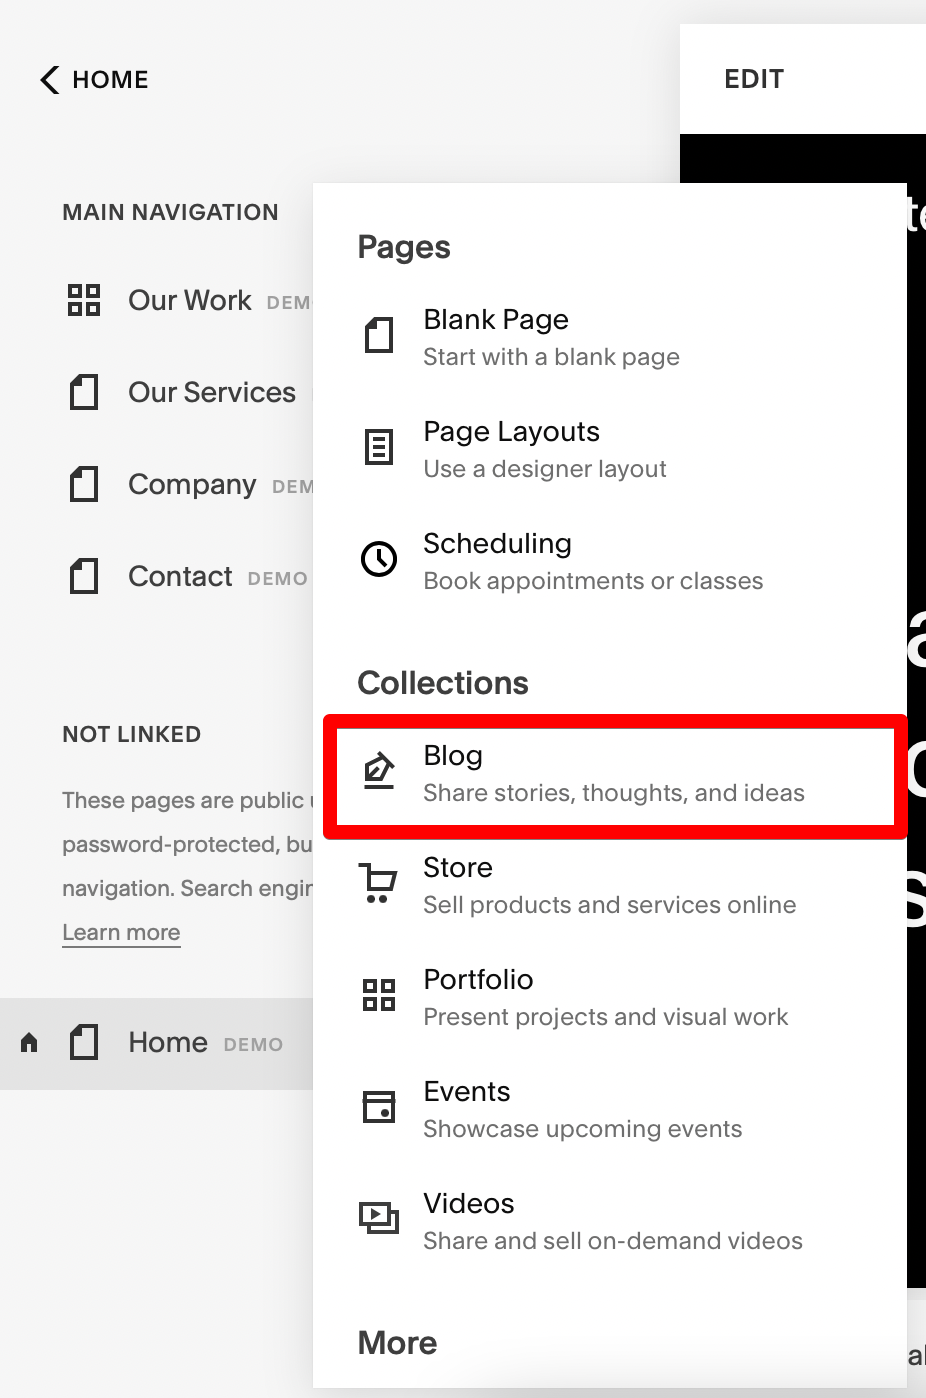
1. Create a New Blog Page and Post
To add a Squarespace testimonial slider, the easiest method is to create a new blog page and post. From your website editor, click the Pages button in the sidebar. This page will not really be visible on your page, so you can choose whatever blog layout you want.

From here, click the + icon under Not Linked to create your blog page. It might be easiest for you to label your new blog “Testimonials” to keep track of your information.
2. Add Testimonial Content
Once your new blog page has been created, navigate to the new page. Click the + icon to add a new post where you will start to enter your testimonial content. You can enter a post title if you want to keep your pages organized, but it won’t appear on the slider.
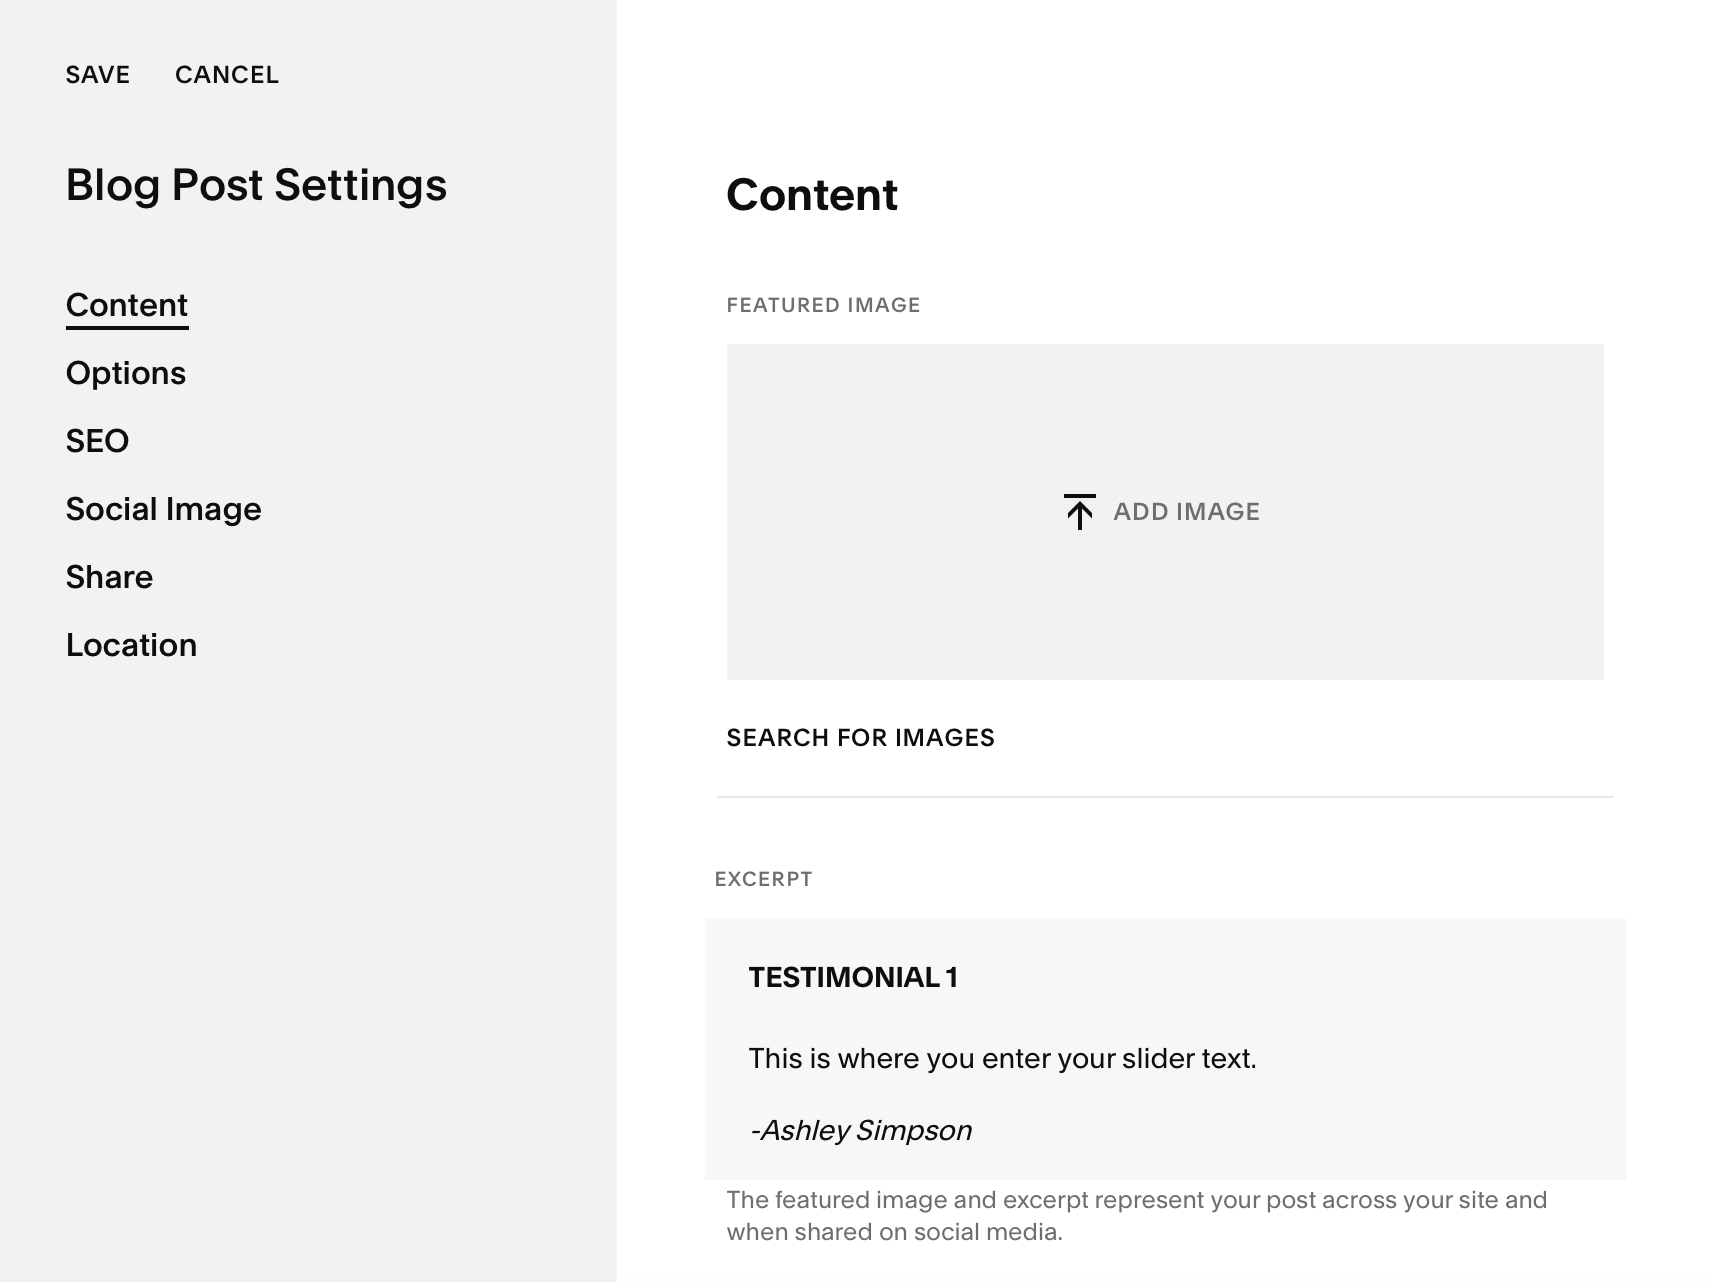
Look in the upper right-hand corner of the screen for the cog icon to open the settings for your new blog. Click Options.
From here, you will scroll down until you reach the excerpts section. This is where you will enter the text of your testimonial.
You can add everything you want here, including the name of the person who left the review. It will all appear in your testimonial slider. Add a photo if you want.

Don’t forget to use the formatting tools to get your text to look exactly as you want it in your new testimonial slider. You can use headers and links in this section.
Click Save and then Publish.
Repeat this step as many times as you need to in order to add all of your testimonials to your new slider.
3. Create Slider
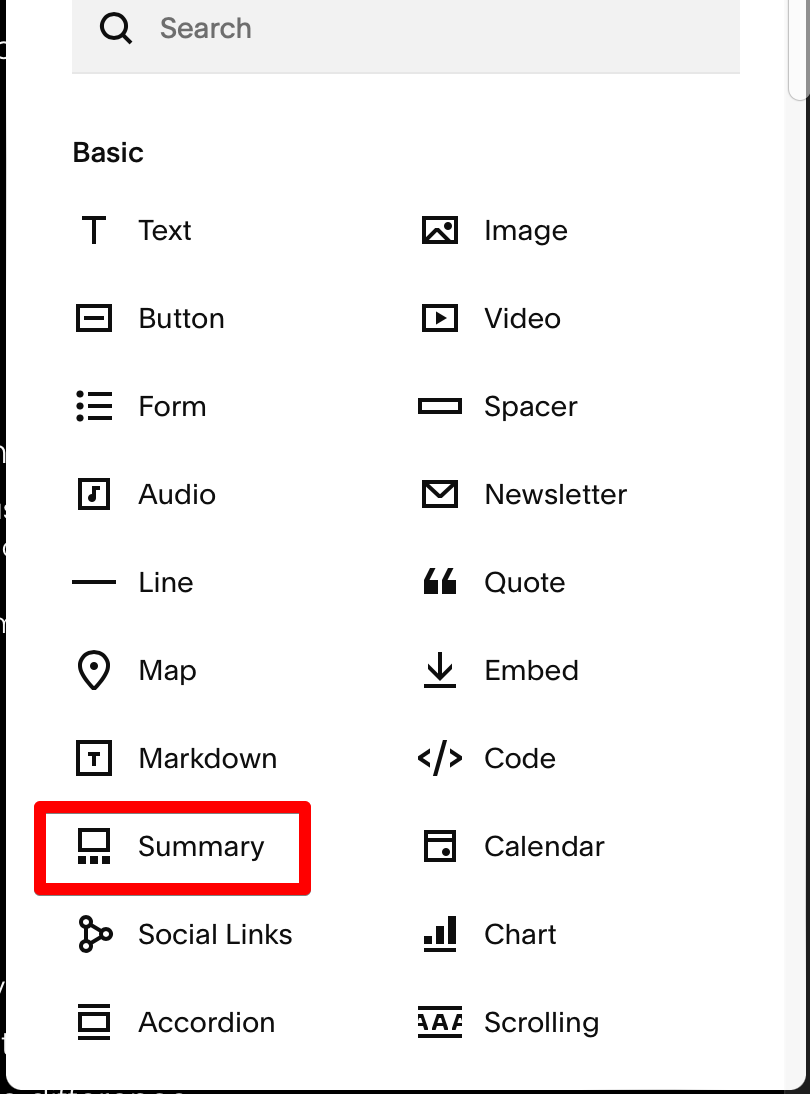
Head to the page where you want to add your testimonial slider, whether that is the home page or a sales page. Add a new block and select Summary.

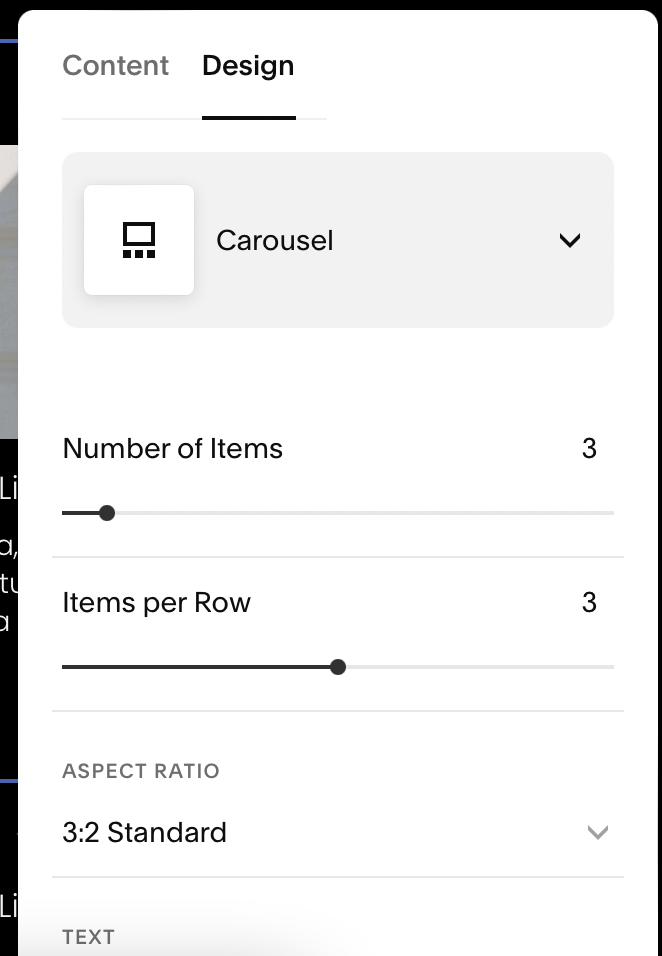
Under the Design tab at the top, click Carousel from the drop-down menu. Select the number of testimonials you would like to add. I added mine for up to 30 so that it would rotate through them all.
Select your desired number of items per row. In this example, we selected two.
This is also where you can play with the size of the blocks of text under Aspect Ratio. I selected a 1:1 square option, but you can see the default options below.

Head to the Content tab and you will select the Testimonials page you created in the previous step. This will pull the excerpts you created under the blogs and will allow you to slide through the different text of each testimonial.

Use a Plugin
If you are looking for something a bit fancier to display your testimonials, then you may want to use a plugin. Here are some of the top choices that you can add to your site.
Fibo Testimonial Slider

The Fibo Testimonial Slider is one of the simpler designs you can use with your Squarespace site. It includes a spot for a circular picture beneath the text of your testimonial. It even has a neatly formatted section for the title or company that your customer works at.
Cost: $30
Aiko Testimonial Slider

The Aiko Testimonial Slider is all about sleek design with minimal frills. If your site has more of a minimalist vibe, then this clean-looking testimonial slider for Squarespace may be the right fit for you. It includes a prominent photo space if you want to include a picture of the client who left you the review.
Cost: $30
Bebe Testimonial Slider

If you want something that is just a little bit fancier than the Fibo and Aiko testimonial sliders, then the Bebe might be the right fit. It features bold color blocks without sacrificing the clean style of the other sliders. Include a picture of your client, their title or company, and the text of your testimonial with ease.
Cost: $30
Adding a Squarespace Testimonial Slider
Adding a Squarespace testimonial slider can be done a few different ways depending on the overall design that you want for your page.
You can add a sleek design without the need to pay for any plugins or you can spend a few dollars to get the slider that you really want. Editing a webpage is quite simple with Squarespace’s layout.
Want to learn step-by-step how I built my Niche Site Empire up to a full-time income?
Yes! I Love to Learn
Learn How I Built My Niche Site Empire to a Full-time Income
- How to Pick the Right Keywords at the START, and avoid the losers
- How to Scale and Outsource 90% of the Work, Allowing Your Empire to GROW Without You
- How to Build a Site That Gets REAL TRAFFIC FROM GOOGLE (every. single. day.)
- Subscribe to the Niche Pursuits Newsletter delivered with value 3X per week
My top recommendations


