When you buy something through one of the links on our site, we may earn an affiliate commission.
If you’re reading this, you’re probably already well aware of email marketing’s importance and don’t need much convincing. But, in case you do, here’s a great article by Campaign Monitor that lists 7 major benefits of using email marketing to grow your business. This post will focus on comparing two (recently) big players in the email marketing platform industry, Drip vs. ConvertKit.
Rather than a generic pros and cons post, we'll go ahead and explore these tools thoroughly. If you don’t have time to go through it all, you can use the subheadings to jump between sections if you’re interested in knowing more about a specific feature. You can also scroll down to the “Moment of Truth” section if you just want the final verdict/recommendation.
[just a short cut: We like ConvertKit more than Drip. It's more powerful, less expensive, and Spencer himself uses ConvertKit for his email list]You can click here to get access to ConvertKit free for 14 days
Run your email marketing campaigns with ConvertKitContents
Exploring Drip
When I signed up for Drip email marketing software and was looking for a free trial, I found something a little more interesting. Drip offers a free forever account for up to 100 subscribers. A hundred subscribers may not be that big of a number to allow you to see crazy ROI from your email marketing efforts. It is, however, more than enough to let you explore what the platform has to offer at your own pace.
The little catch here is that they require your credit card number when signing up, even if you don’t have any current intentions to upgrade to a paid plan. They say they require your credit card number so as not to interrupt the service in case you exceed 100 subscribers. If that happens, they’ll automatically charge your card.
Of course, they may also be asking for credit card numbers to weed out potential spammers as well as freebie seekers who will never upgrade. In any case, it’s a minor hurdle compared to the benefits of a free forever account. After I entered my personal details and credit card number, the process was smooth.
The signup process was quick and painless. I was able to login to my newly created account immediately, and this is what the dashboard looked like:
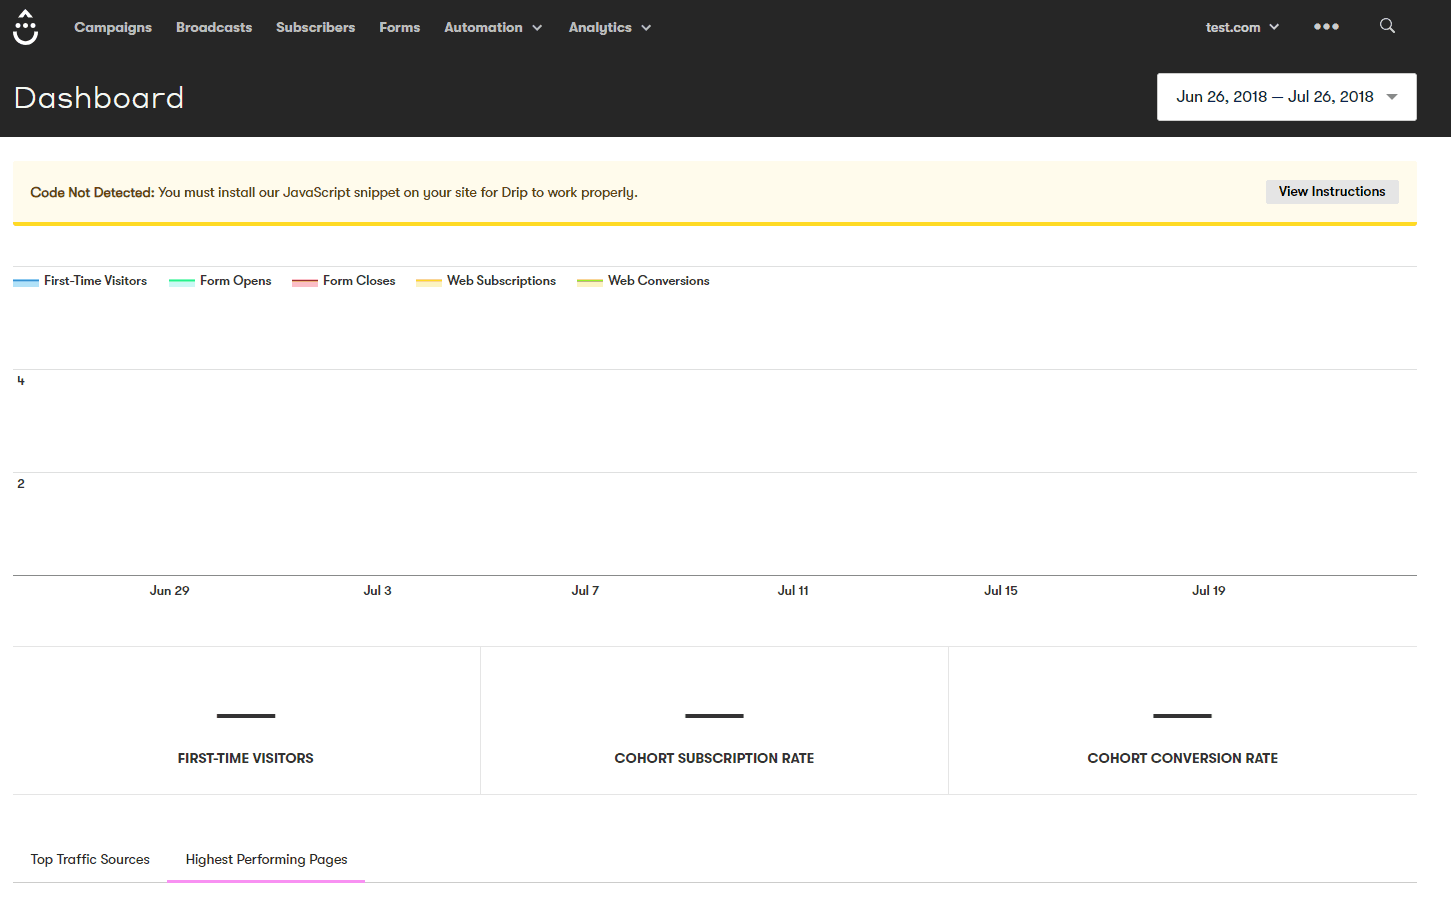
At first glance, the dashboard is similar to what you see with almost any email marketing service or email marketing automation tools in general. Typical dashboards usually display some aggregate statistics in a fancy manner. What I found particularly interesting about Drip’s dashboard, though, is how relevant and insightful the metrics they chose to display in the dashboard are.
Let me explain. Stats you’d typically see here are things like the number of new subscribers today, unsubscribed, and subscription/signup rate. Drip does display these metrics in a neat graph, but right under that graph, they display 3 other metrics: First-time visitors, Cohort Subscription Rate, and Cohort Conversion Rate.
First-time visitors is self-explanatory. Cohort Subscription Rate, according to their description, is “The % of new visitors during this timeframe (your selected time frame) who eventually subscribed (even if they subscribed after this timeframe). Only includes subscribers who have been linked to a visitor identity.” The cohort conversion rate is similar too.
These stats got me more excited than I probably should. The way they link these stats to visitor activity on your website gives so much more insight than just these numbers if they were to be displayed in a “raw” form. It helps you see “the bigger picture” and gives you so much more context instead of just displaying "isolated" email marketing statistics. I love it!
Right under those statistics, you can also see the “Top Traffic Sources” and “Highest Performing Pages” and these provide further insight into which traffic sources and which pages on your website are driving your most conversions.
It’s important to note that to see any of these statistics you need to have the Drip JavaScript code installed on your website so that they can track your website visitors' activity and correlate the data with your email marketing campaigns. This is a pretty straightforward process and they have instructions covering how to do it manually, using WordPress, or using Segment.
Now let’s look at the menu items:
- Campaigns: This is where you create autoresponder email sequences similar to what you do in tools like Aweber and GetResponse. You can create, say, a series of 10 emails that get sent over a period of two weeks automatically.
- Broadcasts: This is like the newsletter functionality in most email service providers. You can choose a list of subscribers to send an email to immediately or schedule it to be sent out later.
- Subscribers: This is where you import, manage and prune email subscribers.
- Forms: You create email marketing signup forms using this section; you can then integrate them on your website to collect subscribers.
- Automation: This is where the magical visual email automation builder lies. You can get really creative here with triggering advanced automation workflows, and it's all built visually.
- Analytics: As of writing this, this tab houses 9 different reports as well as conversion tracking settings.
Now let’s go ahead and explore each tab.
Campaigns
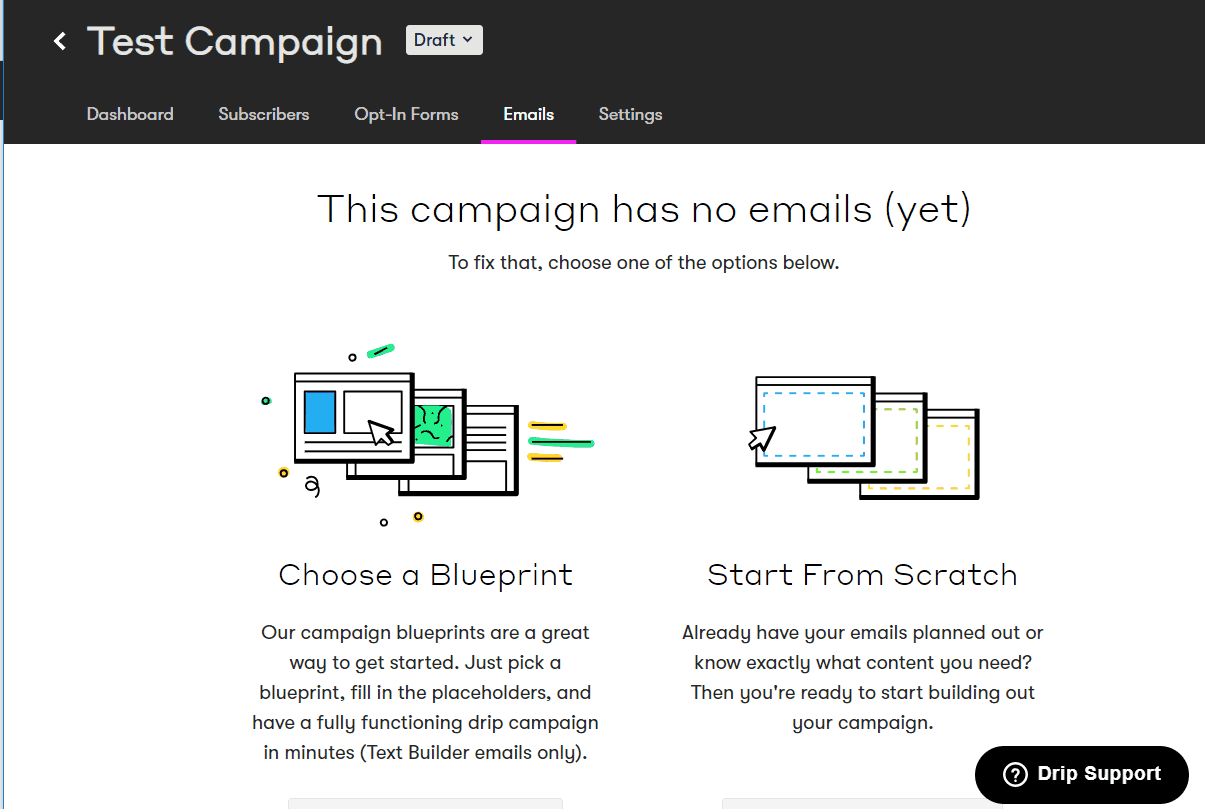
When you enter the campaigns section inside drip, you have two sub-tabs. The campaigns list and split tests. Creating a new email marketing campaign is straightforward enough and intuitive, you press "create new campaign" and choose a campaign name.
You’ll then be presented with the two options in the image above. You either opt to use a “blueprint” or you create an email sequence from scratch. The “from scratch” is pretty self-explanatory. The “blueprint” is what’s interesting, though; here’s what shows up when you choose this option:

As of writing this, there are 12 “blueprints” you can choose from. A blueprint is just a premade sequence of emails, set to be used for a specific purpose. So, for instance, they have a 5-Day Mini Course blueprint, a cart abandonment recovery blueprint (for e-commerce), as well as blueprints for sales/specials, consultation calls, welcome emails and post-purchase upsells.
These blueprints are perfect to get your feet wet with email sequences and give you lots of different ideas that you can work on yourself.
You can easily preview emails within any of the blueprints by clicking “view email”. Using the blueprint is also a click of a button away. You can do so by clicking “use blueprint”. Once you do that, you can customize every aspect of the blueprint to suit your needs:
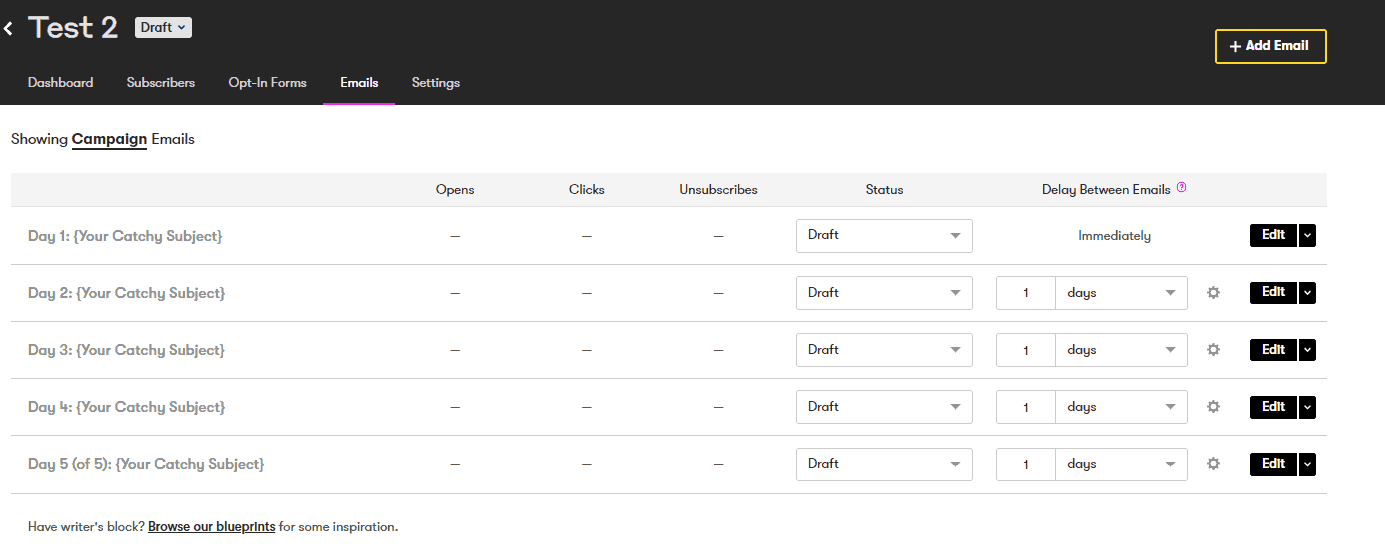
If you choose to go the “from scratch” route, you’d pretty much end up in the same place, except that you’d have to create each email from scratch. To do that, you can use either their text editor or their new visual email builder, which we’ll be covering in the Broadcasts section.
Before we head there, though, I wanted to give you a quick overview of the split testing section under campaigns. Here’s what it looks like when you want to create a new split test:
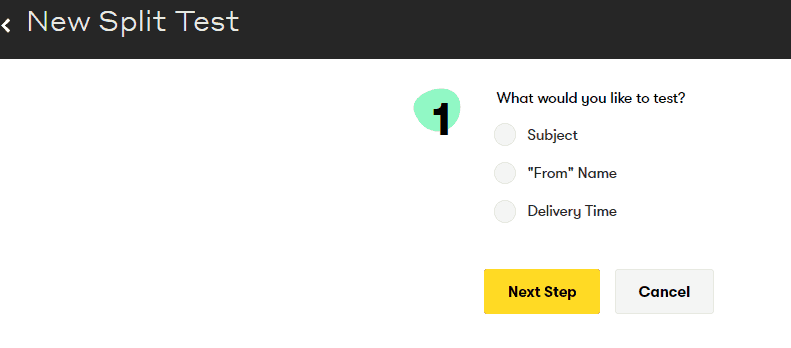
Easy enough to work with. The only problem I see here is that you can’t split test email content, which is big. Email marketing Tools like ActiveCampaign are really powerful when it comes to split testing as they let you test almost anything, not the case here though.
Broadcasts
Broadcasts are basically one-off email “blasts” commonly used to send newsletters, for example. It’s fairly straightforward to start one. You click “New Broadcast Email” and then choose whether you want to create one using the text editor or the visual builder.
You also choose who you want to send your email to among your subscribers. You can filter in many ways, such as tags, people who have interacted with your previous emails...etc. This would help you zero in on the exact subscribers you need to reach.
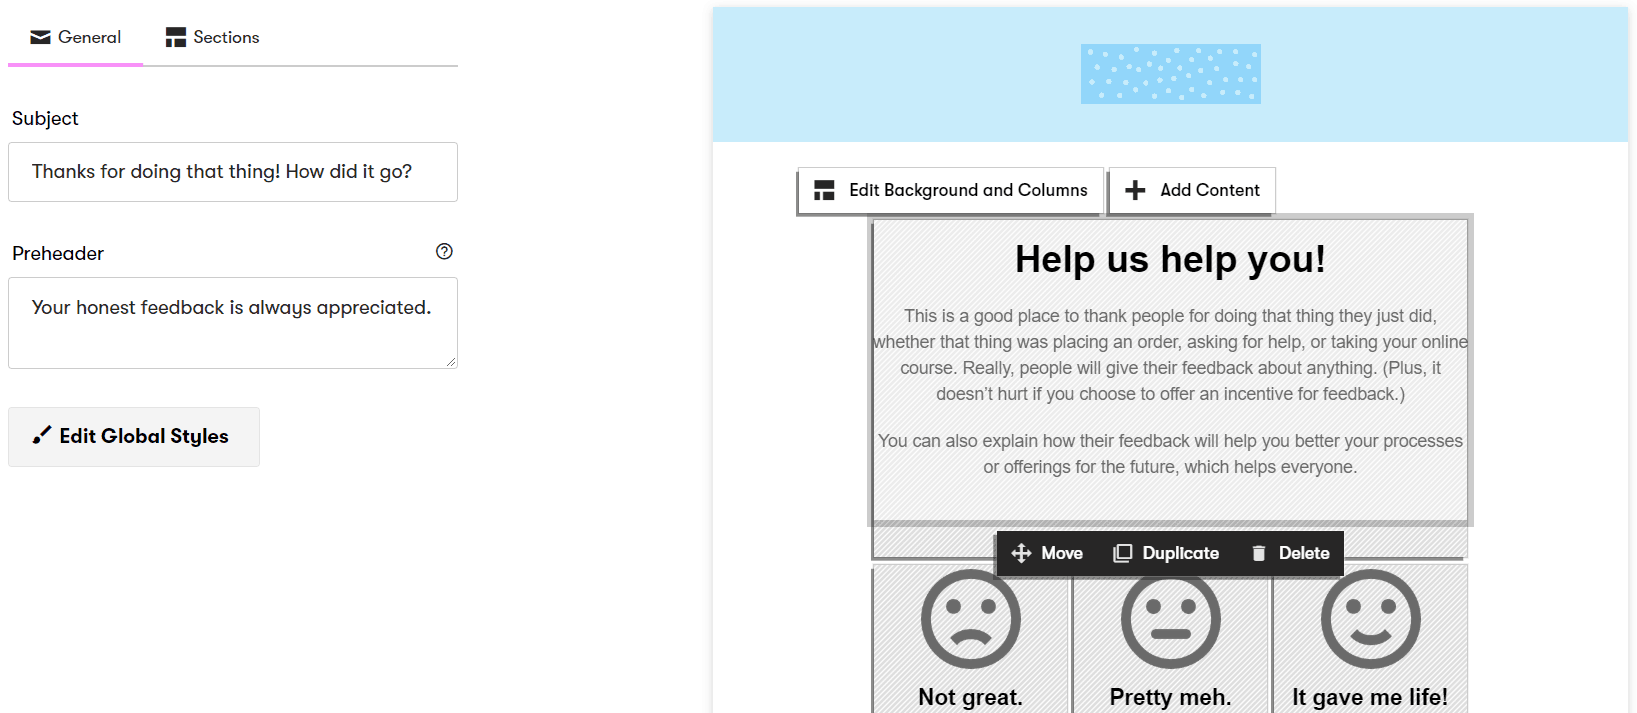
Common features like sending test emails and previewing how your email would look at different screen resolutions are also present and easily accessible. As of writing this, the visual builder is still in beta, but it generally does a good job.
I would have liked it a lot better if it was a bit more intuitive, though. Moving elements around is a little rigid, and you have to get into a “move mode” to move them. You also have to mess with columns and sections before adding any content. How that is done wasn’t immediately obvious to me.
The elements you can add as of writing this are limited as well; you can only add an image, text, call to action button, or spacer. I honestly rarely use fancy emails and generally prefer the plain text types, so this does not bother me that much.
But for people who’ll be heavily dependent on that builder and like to send out emails with a lot of bells and whistles, they would appreciate some improvements to it. Let’s not be very judgemental here, though, as they’ve clearly labeled this as “beta,” so we should cut them some slack.
Subscribers
When visiting your subscribers section, you can see a list of all your email marketing subscribers. You also have a few sub-tabs that give you additional subscriber management options:
- Saved Segments & Tags: These are two different ways to organize your subscribers. This way, when creating email campaigns or broadcasts, you can easily choose a group or recipients by choosing their tag or segment. You can manage those in their respective tabs.
- Custom Fields: These are additional data fields you can collect about your subscribers. So in addition to their email, you can collect other info like interest, birthday info or generally anything else that is relevant to your business and could help you personalize your emails.
- Import/Bulk Ops: Like the name suggests, this section allows you to run bulk operations like mass importing subscribers, applying a certain tag to them or subscribing them to a specific campaign.
- Pruning Operations: Keeping your email list clean is super important because it directly affects your costs. You really don’t want to pay for subscribers who never opened your emails and never will. Pruning helps you automatically filter and remove dead weight subscribers.
Forms
There are two main sub-tabs here: design and rules. Under design, you can create opt-in forms and get the HTML code to embed them. Form design here is pretty limited though, you’d almost always want to use a third-party solution such as LeadPages or Thrive Leads.
You can add custom form fields, customize the confirmation email as well as the post-signup actions. You can have Drip display a message or redirect to a thank you page you’ve created. You can also send subscriber data to the thank you page (for personalization) or/and to Google Analytics.
The other subtab is “Rules”. Using rules you can trigger certain actions when this form is submitted. You can do things like add subscriber to a campaign, apply a tag, record a custom event or even trigger third-party actions like adding the subscriber to a Facebook Custom Audience.
Automation
Automation has two distinct features. First is workflows, and the second is rules. Rules is the simpler version. With rules, you simply define a trigger and an action. So, for instance, if someone is added to Drip campaign A, also add them to a Facebook custom audience. Simple enough. The juicy stuff though, is in the visual workflows builder:
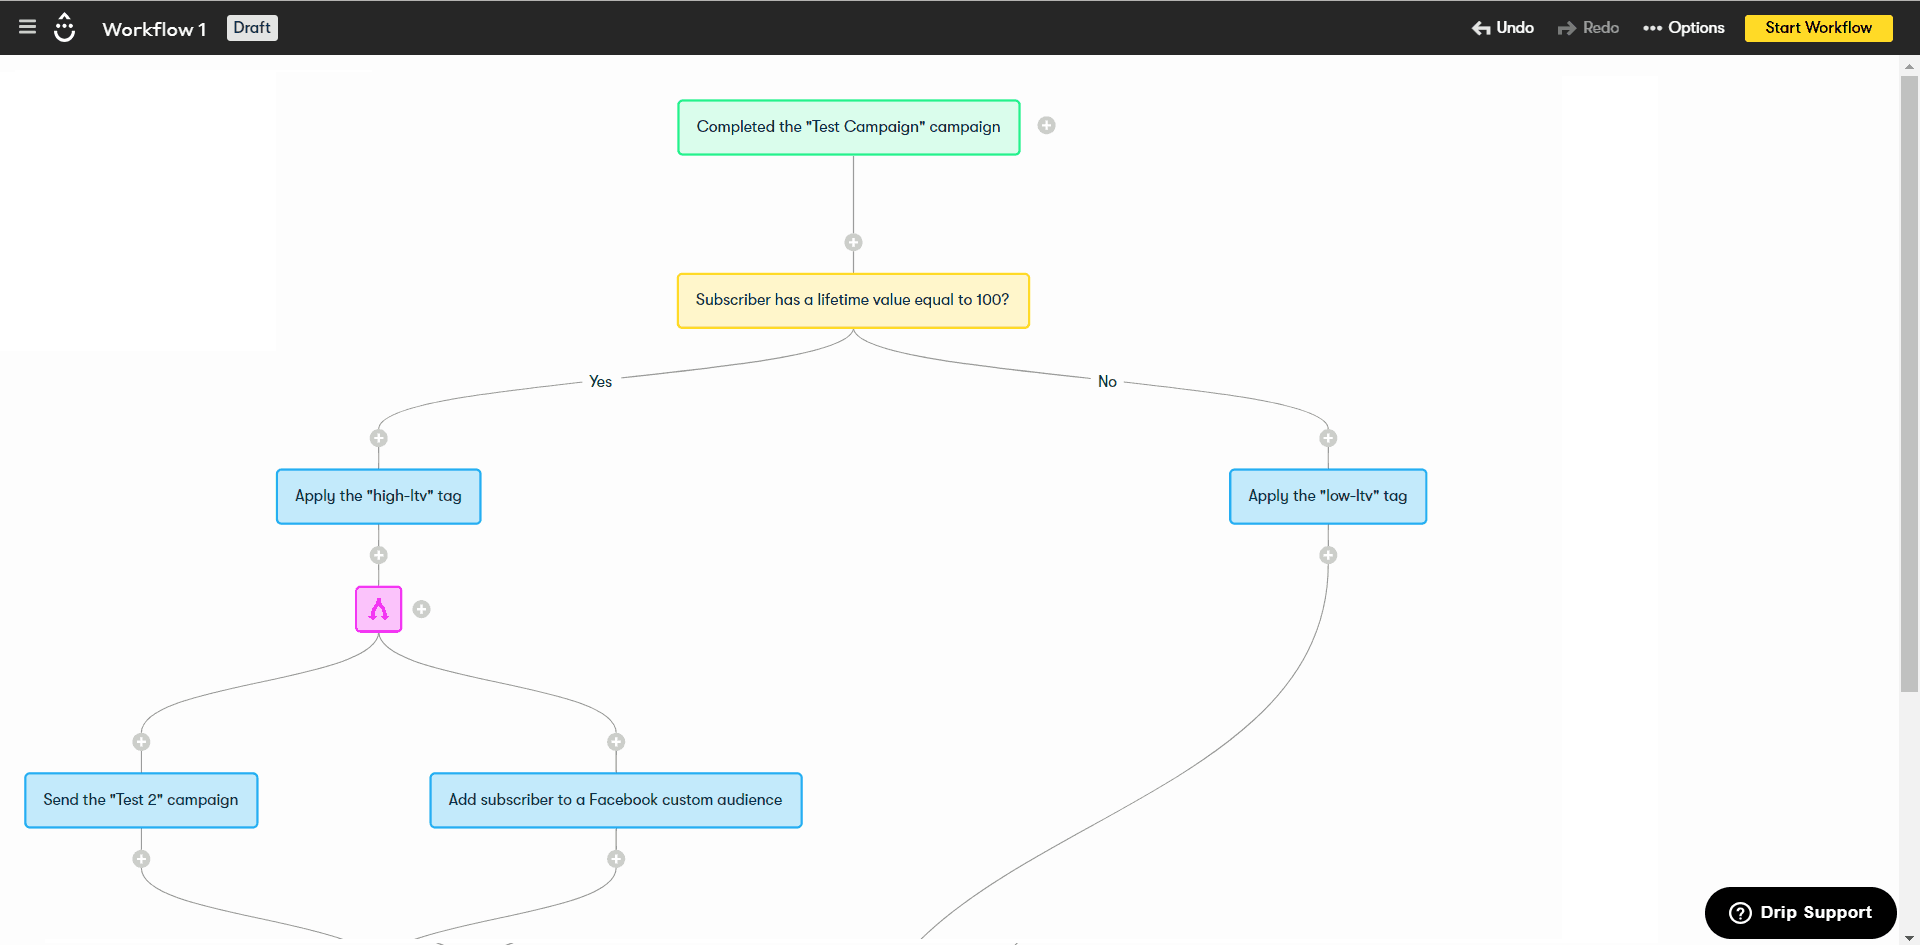
The beauty of the workflows builder is that it allows you to create REALLY complex automations in a visual way. You start with a single event that triggers the whole automation, that’s the green rectangle at the top. You can then trigger certain actions, make decisions, or more.
So in the case above, we wanted to check subscriber lifetime value. If it’s above 100, we will tag them and add them to a campaign. We will also add them to a Facebook Custom Audience at the same time. If their lifetime value is below 100, we will add a different tag to them.

This is a really, really simple example. You can combine a ton of different triggers, actions, and decision making to make things really personal for your subscribers, and it’s all at a fraction of what something like Infusionsoft costs.
Analytics
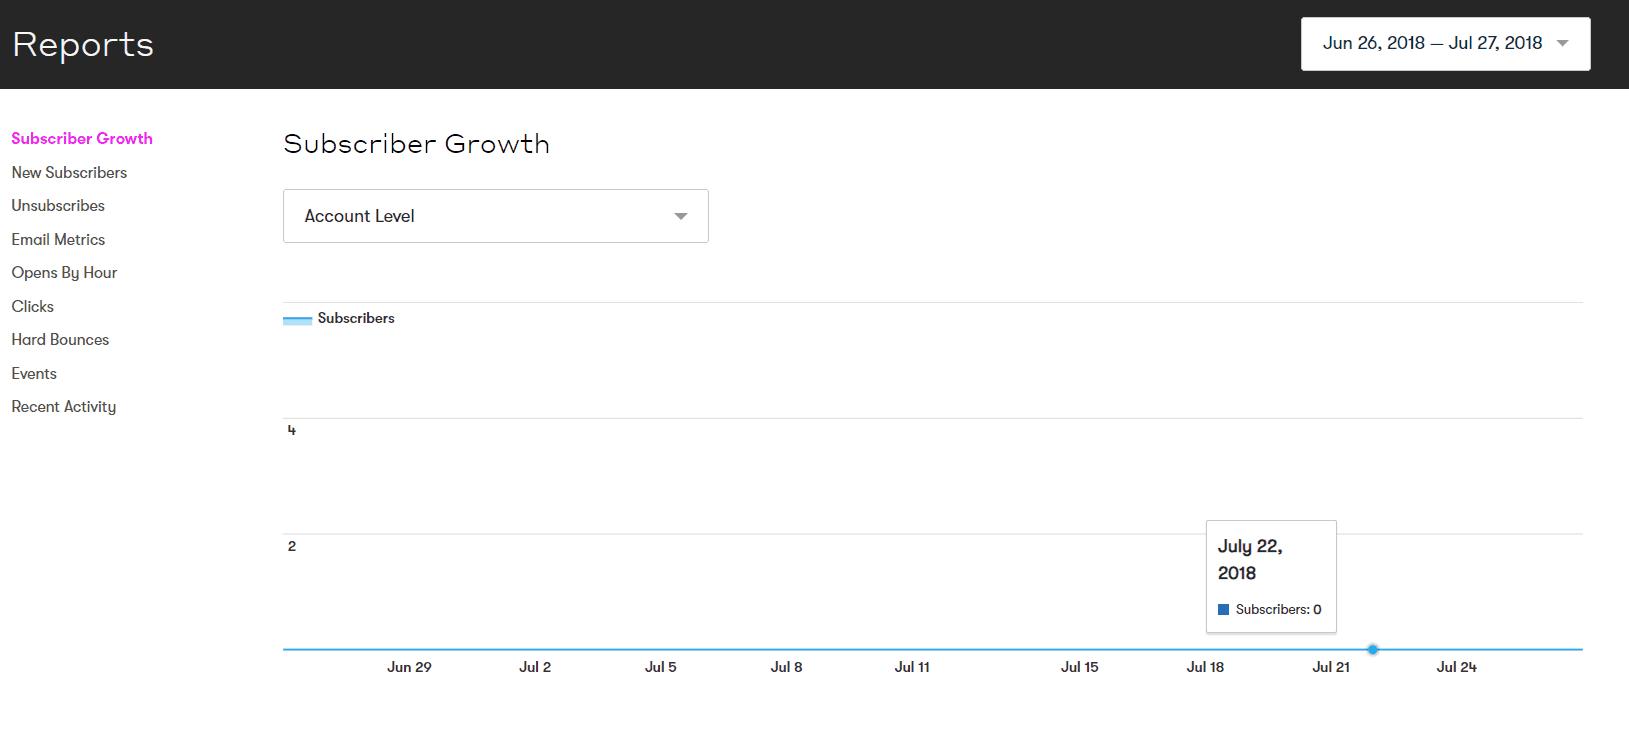
As of writing this, the Analytics section in Drip has 9 reports: Subscriber Growth, New Subscribers, Unsubscribes, Email Metrics, Opens By Hour, Clicks, Hard Bounces, Events, and Recent Activity.
Reporting isn’t incredibly advanced. Most reports simply feature a graph showing how the specific metric you’ve chosen has changed over time. You can also choose to do this on the account level or on a campaign level to assess the performance of a specific campaign.
Exploring ConvertKit
We’ll now start exploring ConvertKit. To save some time, features that work exactly like Drip will not be explained from scratch. Instead, I’ll be focusing on highlighting the differences. So let’s jump to the dashboard:
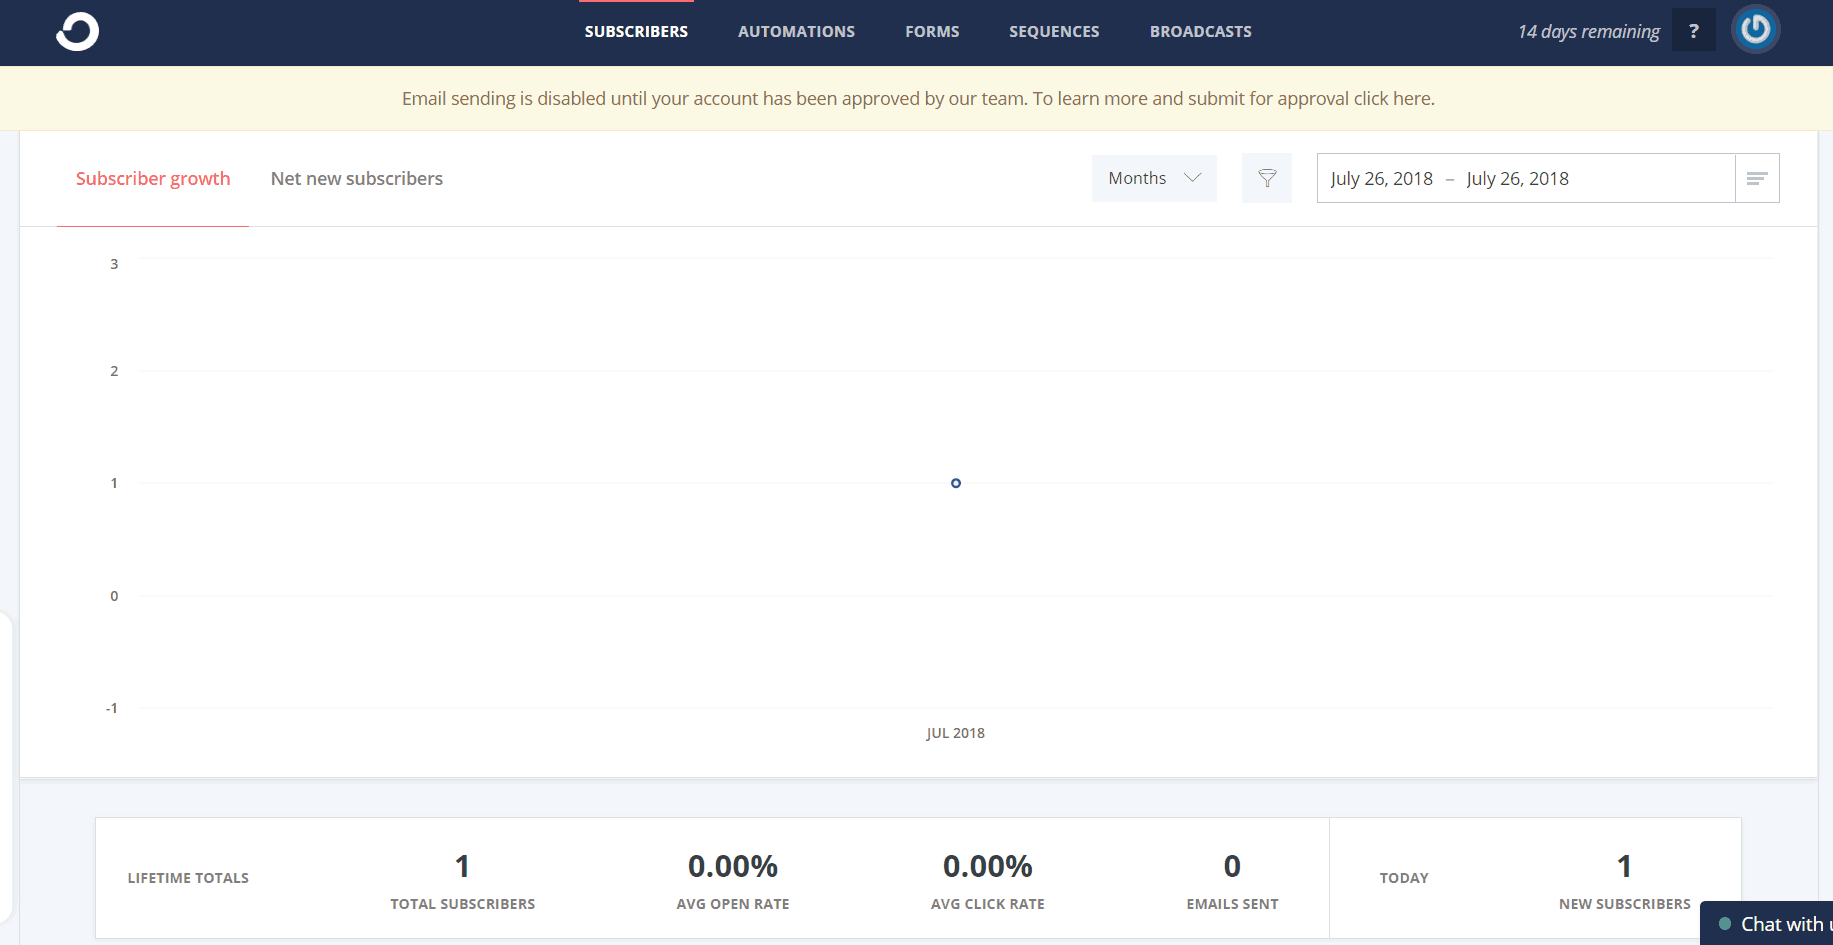
As of writing this, ConvertKit does not have a dedicated dashboard section, but the account’s “homepage” currently lands on the subscribers section. At the top of the page, there are some subscriber-related statistics such as total subscribers, avg. open rate, avg. click rate, total emails sent, and total new subscribers acquired today.
You also get to view the subscribers’ details and can import subscribers or create tags and segments. You can also do some bulk operations like deleting, tagging, exporting or adding subscribers to specific sequences in bulk. “Sequences” here are the equivalent of campaigns in Drip.
Automations
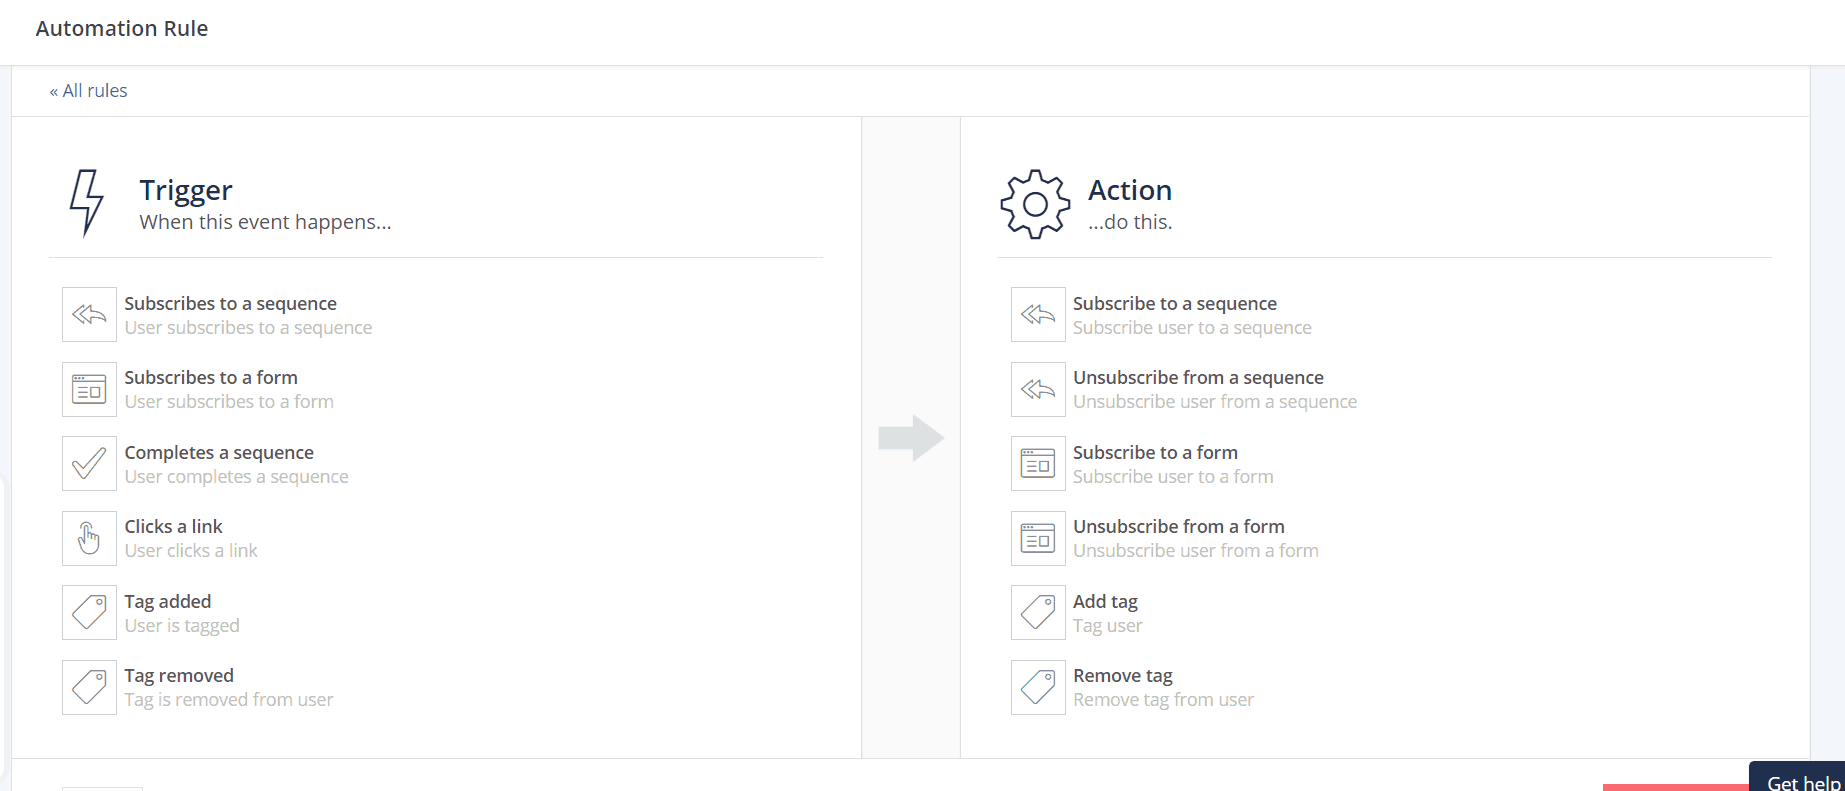
Similar to Drip, ConvertKit has “Automations” and “Rules”. Automations are very similar to Workflows in Drip. You also build them visually and in almost the exact same way as drip. Drip’s workflows are certainly a lot more advanced though.
One reason is that they allow you to create “decision nodes” based on more criteria. This includes email activity, subscriber lifetime value, signup source, timezone, lead scoring and more. In ConvertKit, decision making is solely based on whether the subscriber has a specific tag/custom field or not.
Another notable difference is that ConvertKit has “blueprints” for rules, similar to what Drip has for campaigns. They also have RSS automations, which allow you to pull your latest blog posts and send them to your subscribers automagically.
This feature supposedly exists in Drip as well, but I could not see it because they say you have to get approval before using it. ConvertKit also includes a section to manage integrations under the automations section.
Forms
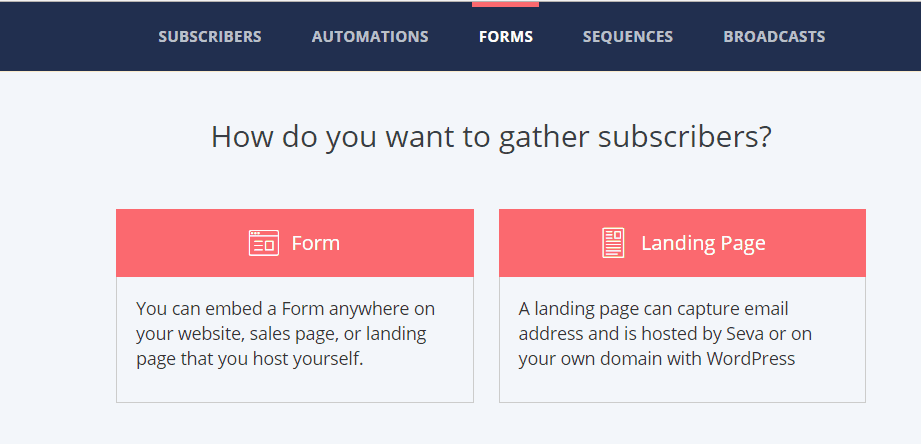
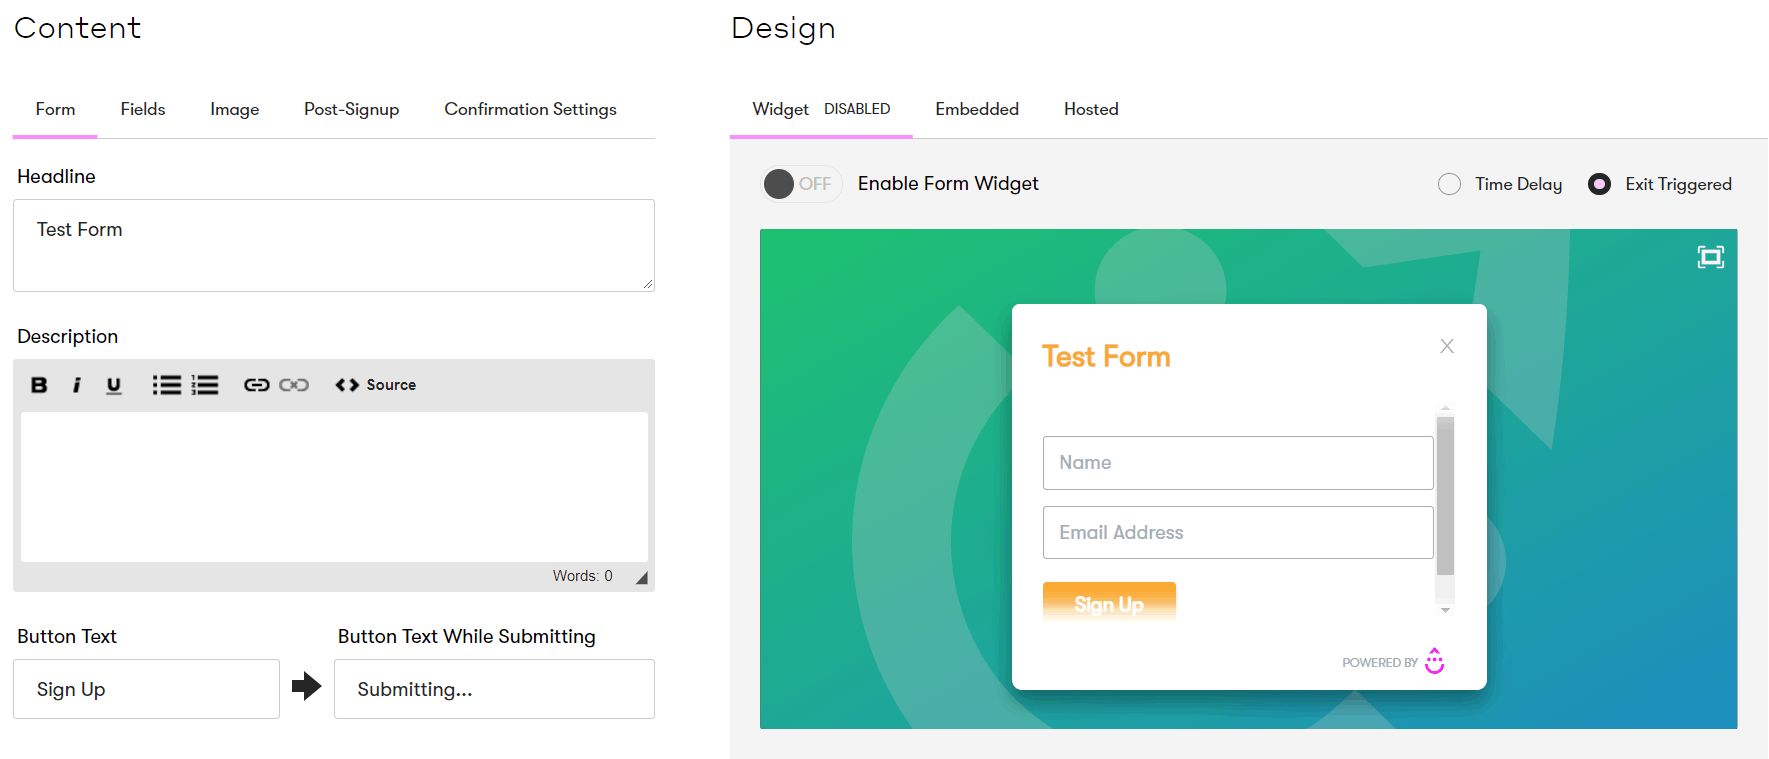
At the top of this section, you can see a graph with some statistics about recent signups. Scroll down, and you can see a list of forms you’ve created. To create a new form, you click the “+Create Form” button to arrive at the screenshot above.
ConvertKit not only offers forms but also landing page creation and hosting. This feature is non-existent with Drip.
You can currently choose between 2 form types (inline/modal) and between 3 landing page templates. Both the form and landing page designer are nothing crazy. A solution like LeadPages or Thrive Leads would be highly recommended instead.
Outside of changing some colors, adding a few form fields and adding a thank you message/redirect, there isn’t much more that can be done.
Sequences
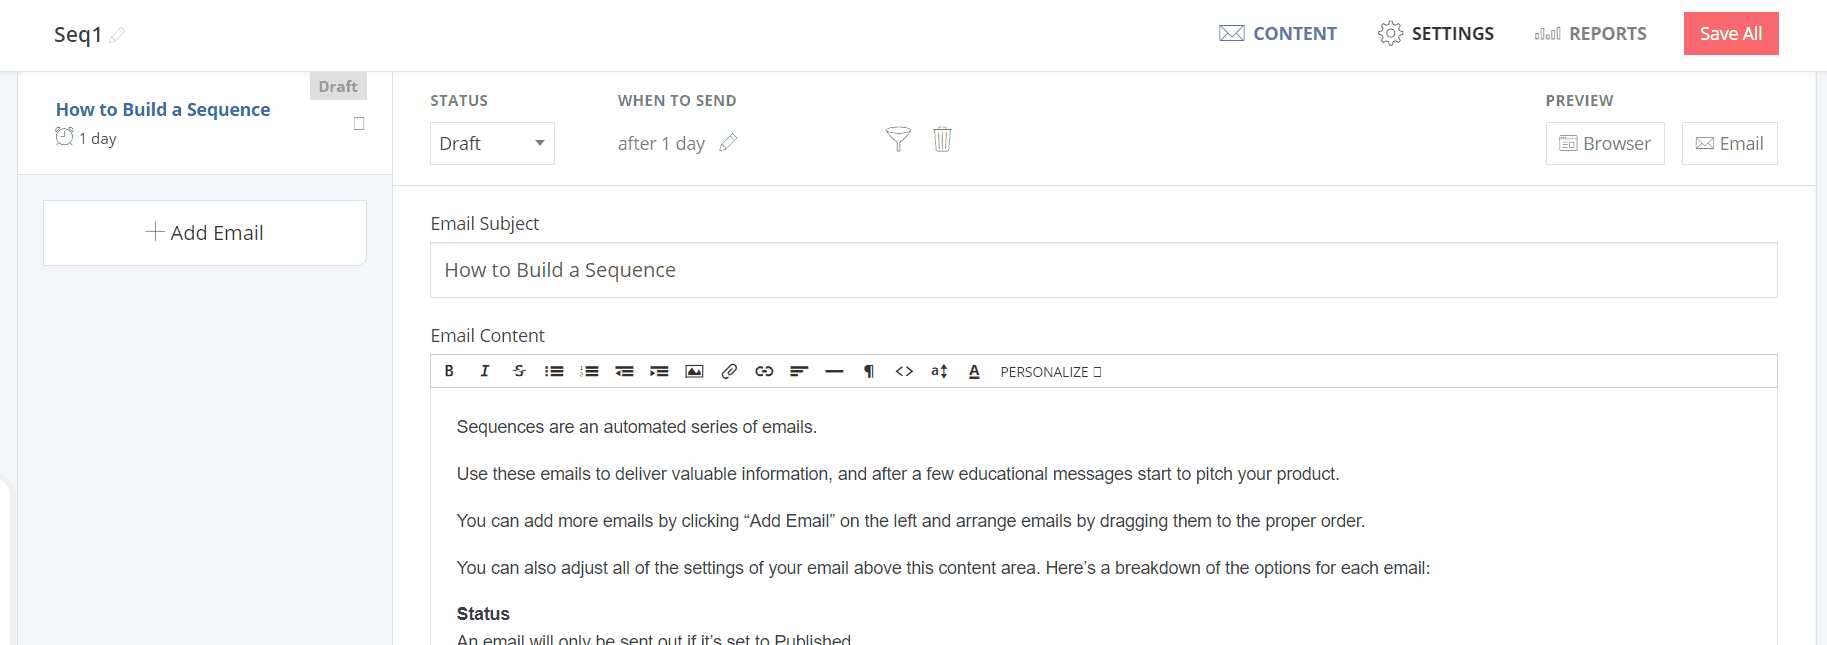
This feature is almost an exact replica of Drip’s campaigns. You build a sequence of emails with an interval between them, and you can then trigger these campaigns using automations. A neat feature I noticed inside this section in ConvertKit is that you can exclude recipients on the email level, not just the campaign/sequence level. Other than that, it almost works in the exact same way as Drip’s campaigns.
Broadcasts
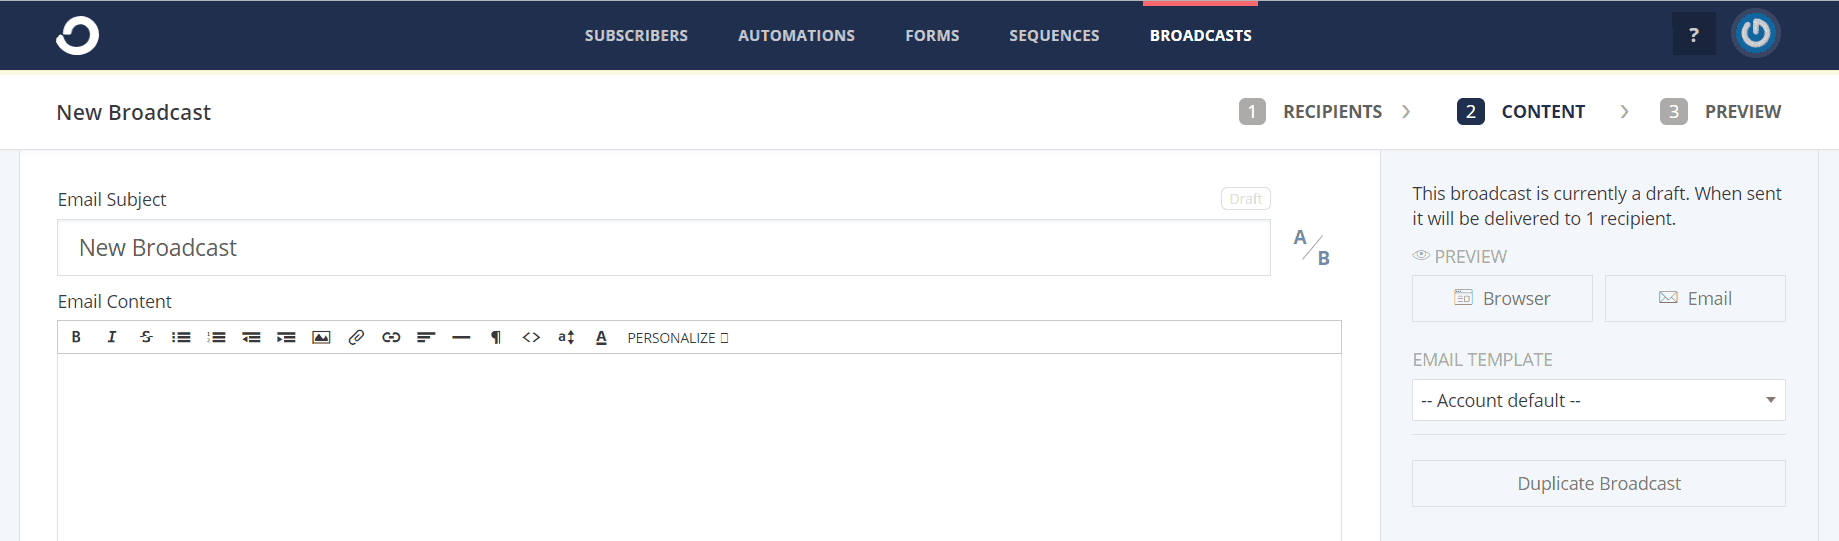
Broadcasts with ConvertKit are divided into 3 classic steps: choosing recipients, writing the email content and then previewing everything. The fourth step is sending of course. There are two major differences I noticed between ConvertKit and Drip in this area.
First off, ConvertKit seems to only allow you to A/B test subject lines while Drip lets you also do “From” and delivery times. ConvertKit also lacks Drip’s recently introduced visual email builder. Their email editor is mostly a typical WYSIWYG editor similar to what you see in WordPress when editing posts, for example. Not much room for creativity with that editor.
ConvertKit History
In October 2014, Nathan Barry, ConvertKit’s founder, chose to start focusing on building ConvertKit full-time. During that period, the company was making just a thousand dollars in monthly revenue.
Since then, they’ve grown 300x, according to Barry, and are being used by notable industry influencers such as Pat Flyn, Leo Babauta, and Chris Guillebeau, along with over ten thousand other bloggers. Their team currently consists of 34 people across 26 cities, and they’re a fully remote company. Early July 2018, ConvertKit decided to change their name to “Seva”.
Drip was founded by Rob Walling in December 2013. Walling hired a developer to build the app for him at first. That developer later became his co-founder, Derrick Reimer. In July 2016, the landing page building giant LeadPages acquired Drip. To date, they managed to accumulate over 4,700 customers, and their platform sent over 1.8 billion emails in total on behalf of their customers.
Get a 14 Day Free Trial of ConvertKit Here
Drip vs. Convertkit: The Moment of Truth
You may have noticed that I haven’t mentioned anything about pricing until now. I wanted to give you a tour of both ConvertKit vs Drip first and then use pricing in context for this last section.
Drip offers 100 subscribers for free, and then the plans start at $49 for up to 2500 subscribers. ConvertKit, on the other hand, does not have free plans, but their starting plan is $29 for up to 1000 subscribers.
For more than 2500 subscribers, Drip charges you $99 per month up to the 5000 subscriber mark, at which they then say it “varies” and that you should contact sales. With ConvertKit, you’re still on the $49 plan till 3000 subscribers, and then it jumps to $79 up to 5000 subscribers.
There’s a $20 difference in ConvertKit’s favor with all their major plans. ConvertKit isn’t only cheaper, but you get more for your buck in terms of the number of subscribers, especially if you have a small list.
Note that you get 2 months free with both services if you choose to pay annually.
So in the battle of ConvertKit vs Drip, which one should you go for? If I’m being honest, I think the Drip email marketing platform would be the winner hands down if their price point matched ConvertKit’s. However, they’re significantly more expensive, but they do offer a lot more as well. The question here is: do YOU need those additional features for your online business?
I doubt you do. Even Spencer (Niche Pursuits' founder) uses ConvertKit email marketing software, and it's more than enough for him. I just don't think the pricing for Drip can be justified.
Check out our comparison article on ConvertKit vs Constant Contact to see how it stacks up against another competitor.
You can click here to get access to ConvertKit free for 14 days
Run your email marketing campaigns with ConvertKitAnd now, for the moment of truth.
When should you use ConvertKit?
- If you’re mainly a blogger.
- If you want something simple and fast to learn.
- If you want to step up your game with automations and abandon outdated solutions like Aweber.
- If you want to save money.
When should you use Drip?
- If you’re an ecommerce business.
- If you sell lots of different products, courses...etc. in your online business.
- If you need to use complex automations that are not available in ConvertKit.
- If you have no issues with a slightly steeper learning curve and a higher price point.
One last thing to note is that you do not have to tick all those boxes to go for either email marketing solution. Just a reason or two could be enough to move the needle and have you decide on one over the other. The verdict is that both are powerful email marketing tools that you can’t go wrong with. However, the bullet points above should really help you make a decision and go with what would be best for your own specific email marketing needs for your online business.
You can click here to get access to ConvertKit free for 14 days
Run your email marketing campaigns with ConvertKitRead my full review of ConvertKit Here.
Related Posts


Want to learn step-by-step how I built my Niche Site Empire up to a full-time income?
Yes! I Love to Learn
Learn How I Built My Niche Site Empire to a Full-time Income
- How to Pick the Right Keywords at the START, and avoid the losers
- How to Scale and Outsource 90% of the Work, Allowing Your Empire to GROW Without You
- How to Build a Site That Gets REAL TRAFFIC FROM GOOGLE (every. single. day.)
- Subscribe to the Niche Pursuits Newsletter delivered with value 3X per week
My top recommendations